How to improve the lighting to generate a photorealistic image of the kitchen with a practical example (*Available in the following Quick3DPlan® versions: 10, 11 y 12). (VIDEOS)
One of the most important factors in order to obtain a good photorealistic image of the kitchen we are designing is to improve the illumination of it.
Among the most common mistakes made by Quick3DPlan® users when it comes to illuminating their projects are the following:
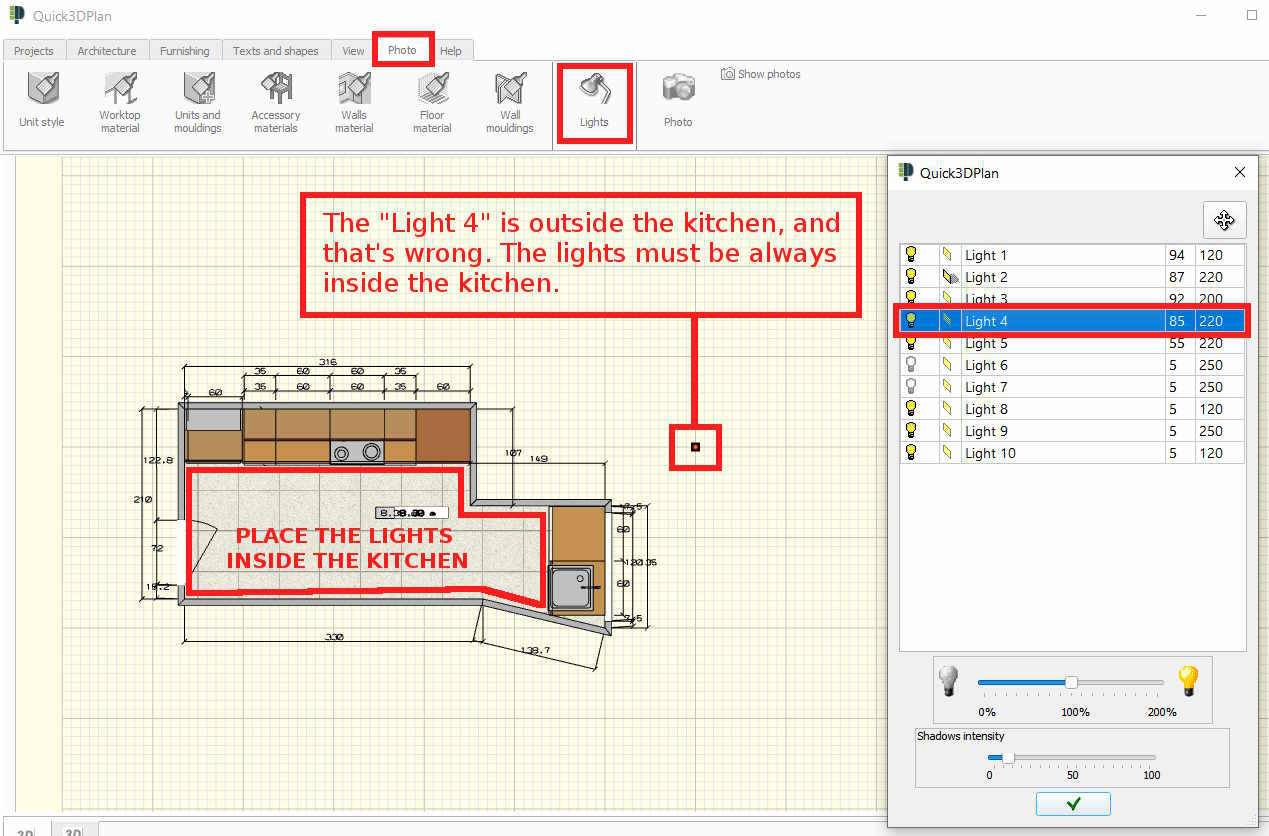
- Place the lights outside the architecture or inside the furniture itself. You can see an example in this capture with the "Light 4", how it is placed outside the room:

VIDEO: In the video below you can see how to place every light in your design:
- Having all (or almost all) the lights activated.
- Configuring the lights intensity with a high value (an intensity value of 90 or 100 is very high).
To improve the lighting of your kitchens and get a photorealistic image, follow these steps:
- Once the kitchen is finished, put the design in 2D, reduce the zoom, go to the "Photo -> Lights" section, and place the lights you want to place inside the room. Keep in mind that lights that are badly placed, have no effect or can even damage the display of the kitchen.
VIDEO: Watch this video to learn how to move the lights:
- It is not always necessary to activate all lights in all kitchens. It is recommended to activate 2-3 lights in the smallest, and 3-5 in the largest, well distributed, and activating the shadow only in one light.
- Set the light intensity in values between 5-20, and modifying the elevation of them, according to the needs of the kitchen and the project.
- Finally, we must bear in mind that each kitchen is a world, and that getting good lighting is based much on practice, and trial and error, activating or deactivating lights, lowering or raising the intensities a little, modifying the elevation of them, etc.
EXAMPLE:
Below you can see an example where we apply the tips mentioned above to generate a photorealistic image of the kitchen:
- Here you can watch a video with the process to make a photorealistic image.
- Click here to download the final image with maximum resolution.
- Click here to download the kitchen project to generate a photorealistic image by using the "Photo" tool. Once you have downloaded the project, open it with your Quick3DPlan® 10/11/12, and follow these steps to generate the photorealistic image:
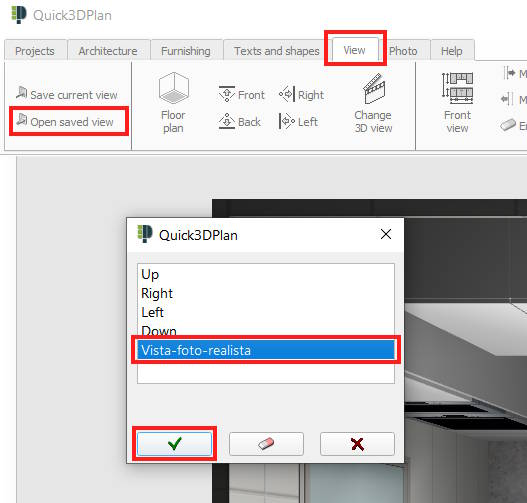
- Go to the "View" -> "Open saved view", select "Vista-foto-realista" view and click on accept:

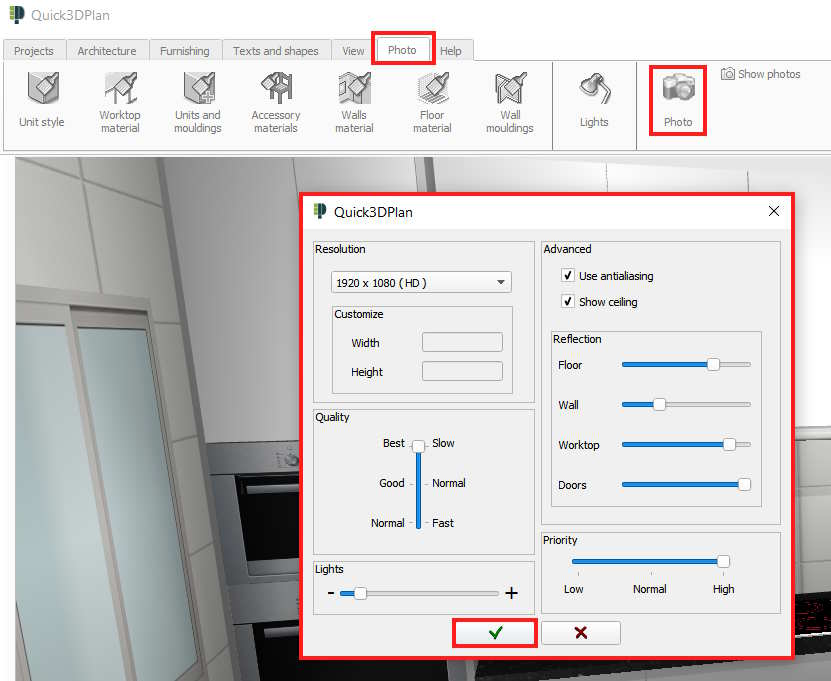
- Next, go to the "Photo" -> "Photo" section, configure the values as shown in the following screenshot and click on the "Accept" button to start generating the photorealistic image. (NOTE: You must bear in mind that during the calculation, the program window may display the message "Quick3DPlan (Does not respond)". This does not mean that the program is not calculating the render correctly. Please wait for the image to appear in the screen):

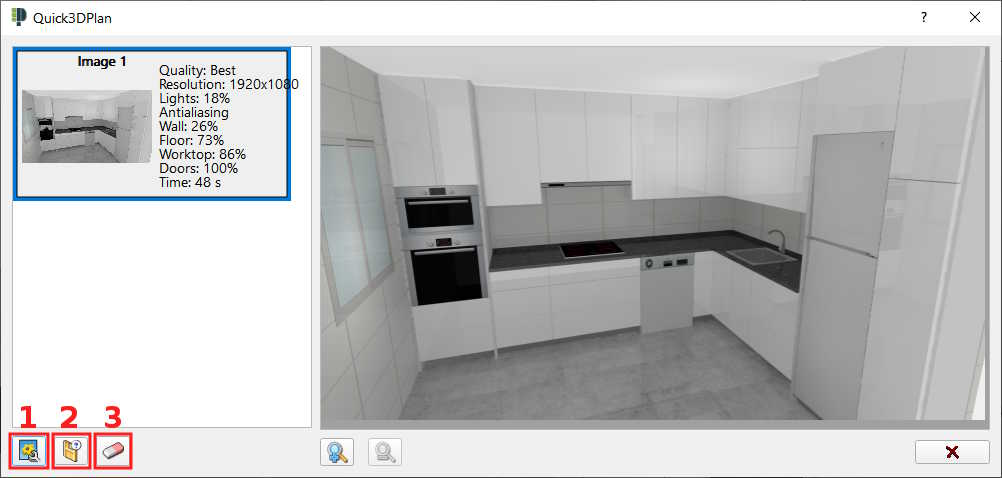
- Finally, the following window appears with the photorealistic image that we just created. You can "edit the image" (change the brightness, contrast, saturation, apply filters, etc...) by pressing the button [1], save it by pressing the button [2], or delete it by pressing the button [3]:

