Quick3DPlan display setup (DirectX or OpenGL), autosave file and antialiasing.
(NOTE: This option is only available for Quick3DPlan® versión 4.0 and earlier.)
Once installed Quick3DPlan®, you can run the "Display setup", following these steps:
- Please completely close your Quick3DPlan program.
- Click on Windows "Start" button.

- Go to Programs, or All Programs depending on your Windows version.

- Click on Quick3DPlan.

- Select the option Quick3DPlan – Display setup.

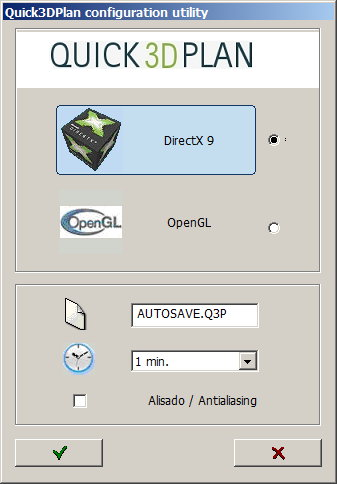
- The "Quick3DPlan configuration utility" window will appear:

In this window you can change the options listed below:
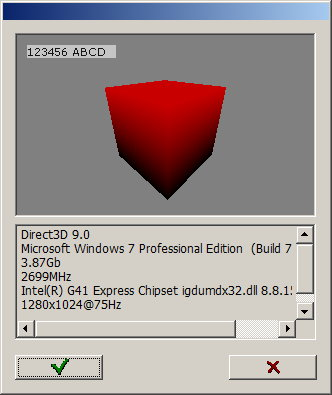
- Video mode: You can switch between DirectX and OpenGL. When you click on one of this options a new window appears showing an image with some text and a red box. It also shows your system information. If you can see the text (123456 ABCD) and the red box correctly, please click OK (the green mark). If you can't read the text or see a black box, please click Cancel (the red X).


- Autosave file name: Quick3DPlan® makes a copy of your drawing every while. Here you can set the name for the auto-save file. This file is saved in Quick3DPlan® folder (the default folder is "C:\Quick3DPlan"). You must enter the name and the file extension ".Q3P".
- Autosave time: Here you can set the time for auto-save. The options are every 1, 5, 10, 15 or 30 minutes.
- Antialiasing: Check this box to enable antialiasing in the actual video mode. This option depends on your video card. If it has this video mode, you will get a better image quality.
