Annex: How to activate the V-Ray window history
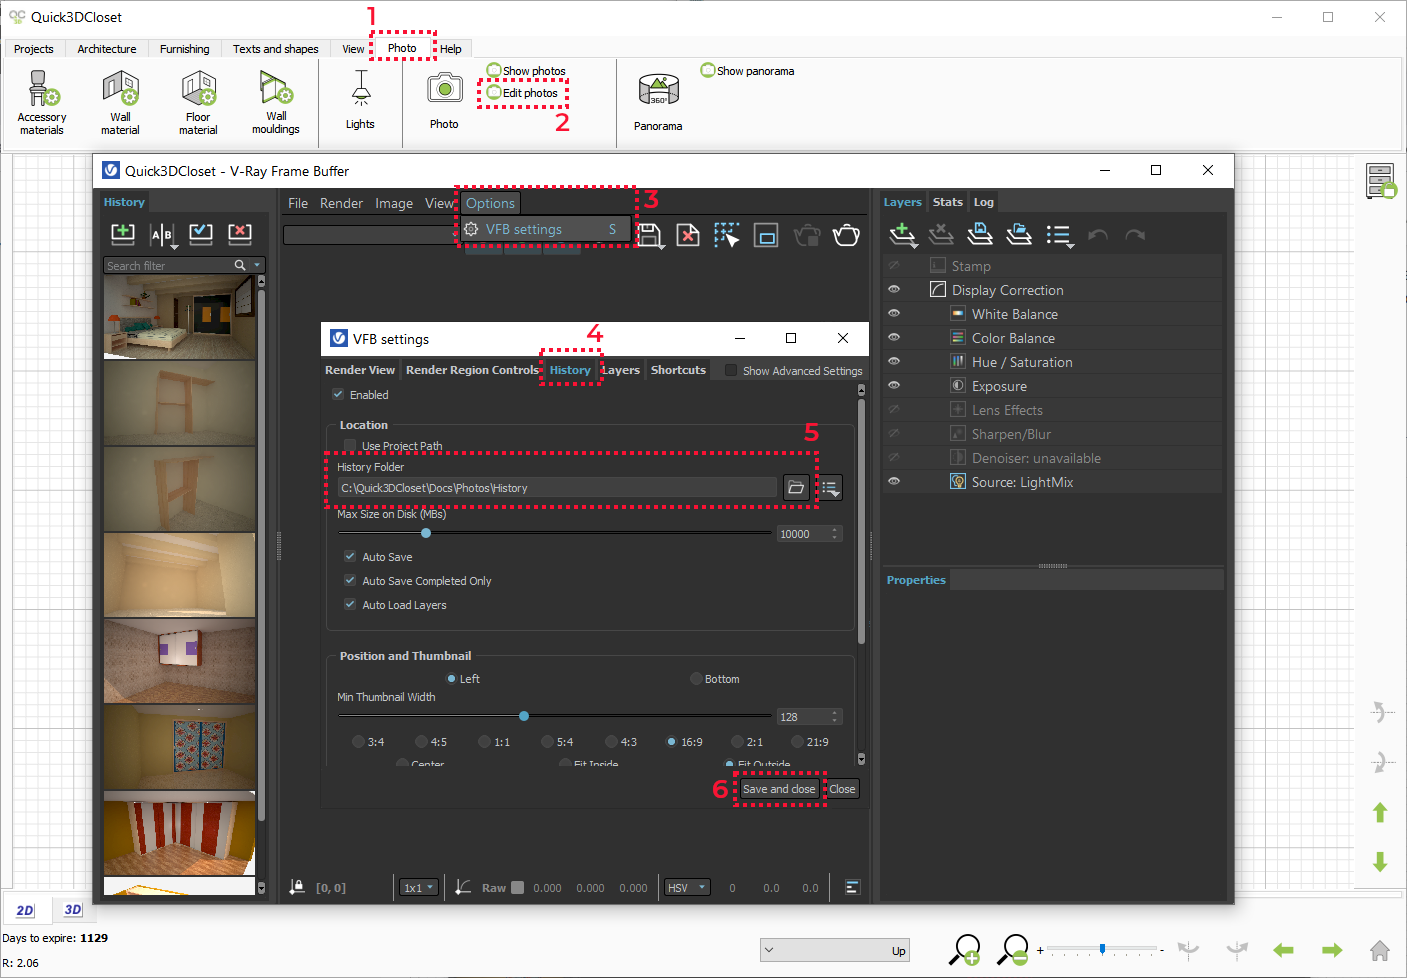
After making your first render or photorealistic image, it is recommended to activate the render window history to see all the images you take with Quick3DCloset®. In order to do so, follow these steps:
- Click on the "Photo" tab.
- Next, click on the “Edit photos” option to display the “V-Ray Frame Buffer” window.
- In the V-Ray render window, click on the text menu 'Options -> VFB settings'.
- In the new window that appears, “VFB settings”, click on the 'History' tab.
- In the “History Folder” section, click the button
 to select the directory where the history images will be saved. We recommend creating a new folder inside the Quick3DCloset® “Docs” folder to keep these images separate from the rest of the design files. (For example, create this folder: "C:\Quick3DCloset\Docs\Photos\History")
 - Finally, click the “Save and close” button to save the changes.