|
|
DRAW ROOM |
Here you will find the tools to create, modify, move and hide the external walls of the room.
When you click on this icon the window below is appears. Here you can select your room layout among five options or you can draw the room manually by clicking on the screen.

 By clicking in any of the five predefined shapes, a window like the one who follows will appear. Wall measures can be set up here as well as its Height and Thickness. After accepting, work area will be created:

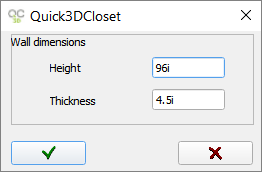
 Clicking on this icon the following window appears. Here you enter wall height and thickness:

After introducing measurements, click on OK. Moving the cursor, you will see a wall whose length adapts to mouse movement. It will be the first wall of the room.
Next to the cursor, the following message appears: "Click to define the edge of the wall or type a length ...". Under this message the program shows the current wall angle with respect to the horizontal for the first wall and with respect to the previous wall segment for the rest of the walls. The default value is 90 degrees.

On the top-left of the screen, a toolbar with the following options appears:
- Set the wall length.
- Enter the wall angle with respect to the horizontal angle for the first wall and with respect to the previous wall segment for the rest of the walls.
- Undo the last inserted wall.
- Triangular to determine the angle formed between any two walls.
- Close the room with a wall that will join the end of the last inserted wall with origin of the first one.
- Cancel the room drawing and exit the command.
To draw the room, you only have to click on the wall corners. Use length and angle tools to help to create the wall.
 Wall length
You can directly enter a length with the keyboard or click on the "Wall length" button and enter the length in the dialog that appears.

The message next to the cursor will show the new length and the program will display a line with this length, waiting for you to click anywhere in the design to indicate the direction of the new wall.
You can also use the mouse or the keyboard keys up, down, left and right to indicate the direction of the new wall.
NOTE: If you enter the value "0" (ZERO) as a measurement in the "Length" field, the measurement of the wall section is determined when moving the mouse.
 Wall angle
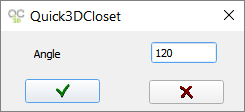
To enter a new wall angle with respect to the last wall, click on the "Wall angle" icon and enter the value in the dialog that appears. If you do not want to set an angle or release a previously set angle, type "0".

 Undo last point
Click here to undo the last inserted wall.
 Triangular
This option allows you to enter a three-dimensional angle. Introduce the measurements and the program will automatically calculate the angle between the two walls.

 Close room
To finish the design of the room, click on the "Close room" button and the program will create the last wall connecting the end of the previous wall with the origin of the first wall in the room.
After entering the third corner of the room, the program displays a grey line that shows the length of the wall that will be created when clicking on "Close room".
If the entered points do not permit the creation of a room, after pressing "Close room", the program displays the message "Architectural design invalid" and the room is not created.

NOTE: You cannot have more than one room per drawing. Because of this, if you click on "Draw room" when having a room in the design, the message below appears to confirm that you want to delete the current room.

When clicking on this icon, the following dialog box appears allowing you to change an internal wall height and thickness. Click on the green checkmark to validate the changes.

This command allows you to move a wall. When clicking on this icon, Quick3DCloset® shows the message "Select wall or press ESC to cancel...". After clicking on the wall, the following dialog box appears to enter the distance:

|
|
After clicking on the green checkmark, two arrows appear on the selected wall. Click on one arrow to move the wall parallel to itself in the direction of the selected arrow. |
This option allows you to hide or show the selected wall. When clicking on this icon, Quick3DCloset® shows the message "Select wall or press ESC to cancel...". After selecting a wall, it will be shown or hidden depending on its previous state.


