How to "simulate" an "L-shape closet".
In order to "simulate" an "L-shape closet" (or a closet with 2 fronts) using the "Closet add-on module for Quick3DCloset®", please follow these steps (NOTE: This is an example with random measures. You may want to adjust the measures to your needs.):
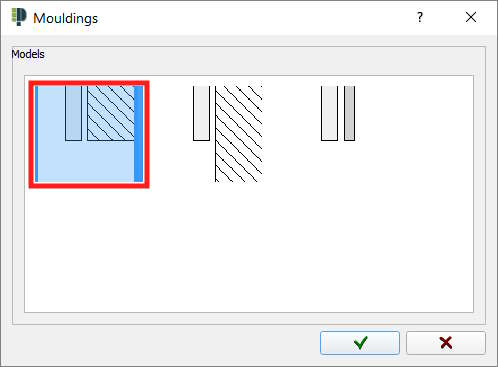
- In the "Add closet" window, select the option below in the "Left moulding" section:

- Select the option below in the "Right moulding" section:
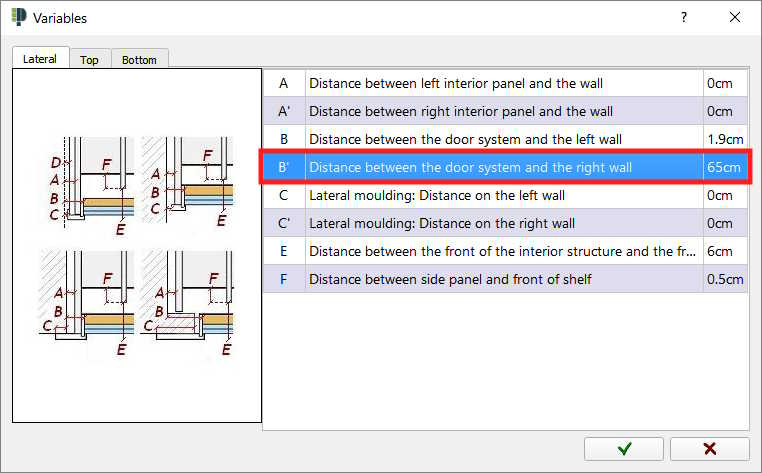
- Click on the "Project variables" button:

- Here you can select the closet variables, change the value "B': Distance between the door system and the right wall" to 65cm (NOTE: This is going to be the other closet width):
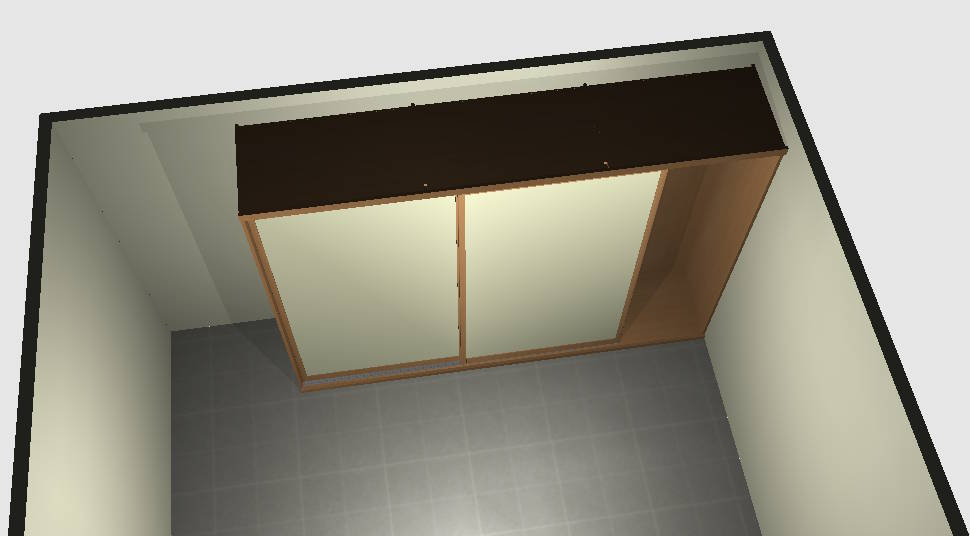
- Insert the first closet that forms the L-shape:
- Click on "Add closet" and select the same moulding that the first closet had in the "Left moulding" section.
- Insert the second closet momentarily at any point.
- Rotate the second closet 90º using the "Rotate closet" button [1], select the second closet [2], insert 90 in field "A=" [3] and click on the "Rotate to the right" button [4]. Close the window:
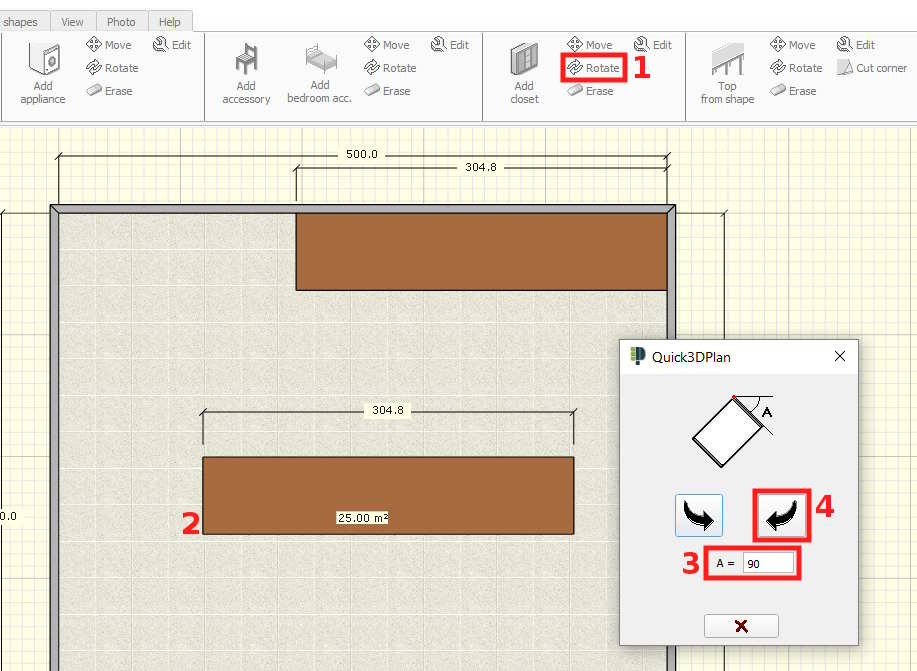
- Once rotated, click on the second closet to drag and drop it right next to the first closet to form the L shape (or use the "Move" button) as you can see in the screenshot below:
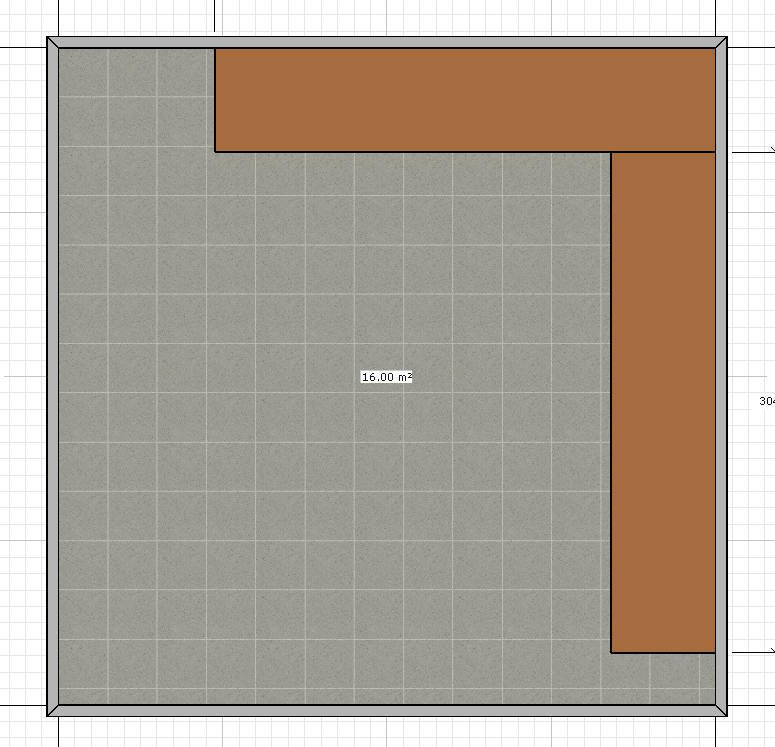
- Here you can see what it looks like:
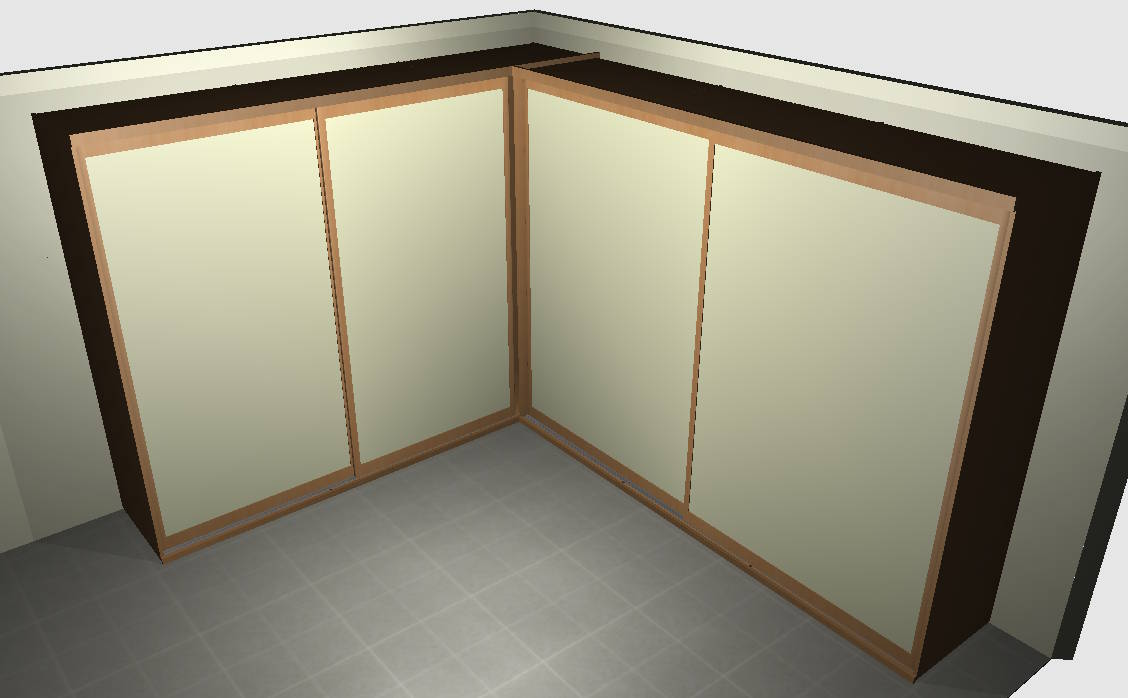
- HOW TO MODIFY CLOSET MEASURES.
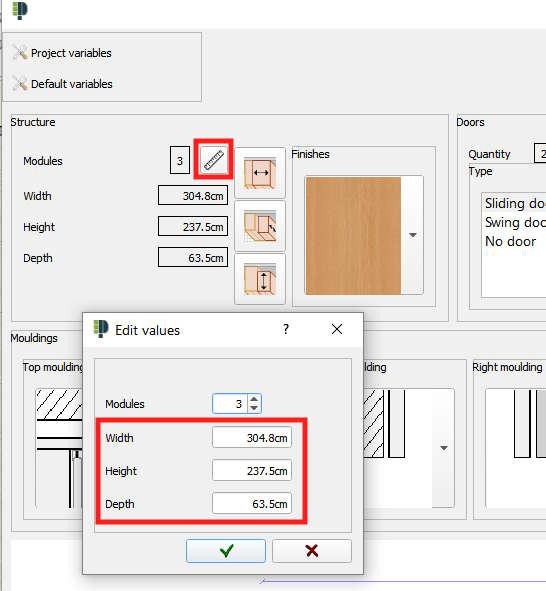
To modify the measures of a closet, click on the ruler in the "Structure" section and you will be able to see a window where you can modify the closet "Width", "Height" and "Depth":
DOWNLOAD PDF: How to make an L-shaped closet with Quick3DCloset®
