|
|
FILE |

This menu includes the file management options:


Click here to initiate a new project and the window to "Draw the room" will appear. You don't need to use this button when you first launch Quick3DPlan® DS because by default it opens a new project. However, you can launch the new project from a current project. Once selected, Quick3DPlan® DS will display a dialog window where you can save or discard changes to the current project.
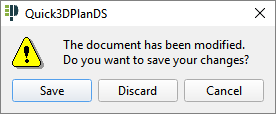
Click on Save Changes if you would like to save the existing project and Discard Changes if you don't need to save the existing project. The “Cancel” option will close this window without making any changes.
|
|
|


This option allows you to open a previously saved Quick3DPlan® DS project. The first time you click on the icon you will be prompted to save or discard any changes to the current project. You will be prompted with this question even if the Quick3DPlan® DS screen is empty. Respond accordingly. If you don't have a project on screen, simply click "Discard" and you will be able to move to the next dialog box where you will see the path where your Quick3DPlan® DS files are saved.

The above window has all the normal tools to open and/or locate a file. You can open a file by selecting it from the list of files or by typing the file name using the keyboard.
Quick3DPlan® DS includes a folder named “Docs” where, by default, your Quick3DPlan® DS files will be stored. You can move your Quick3DPlan® DS files to a different location and create as many folders as you need to organize your Quick3DPlan® DS files.
Once the project is selected, click on the “Open” button and Quick3DPlan® DS will open the project. (TIP: When you open the project, if file units are different to the ones in the program, the following window will appear:)

Tip: Remember to always launch Quick3DPlan® DS first so that you can open your files using the "Open File" function. If you skip launching Quick3DPlan® DS and instead double click on an Quick3DPlan® DS file, it will not open properly and the file may give you an error message.
Tip 2: When the program starts, the following window will appear and will let you create a "New project", click on "Open a project", initiate the "Step by step wizard" or open a "Sample project":

|
|
|

As with any software application, when you are working on a project, it's always recommended that you save your file periodically to avoid losing information.
To do this click on the "Save" button. If you haven't saved your file before, type a name for the file in the "File name" box.
|
|
|

This command allows you to save the current project with a new name or to select a different location to save it. Once you click it, Quick3DPlan® DS will display the "Save As" window shown below.

In this window you can select the location where you want to save the project. To do this, type in the name of the project in the "File name" space. By clicking on the save button, Quick3DPlan® DS will save the project with the new name and in the location selected.
From this moment on, when using the "Save" command, Quick3DPlan® DS will save the changes under the same file name.
|
|
|