|
|
STEP BY STEP WIZARD |

The kitchen design wizard allows you to design a kitchen in an automated mode.
The kitchen design wizard is structured in several steps, each one prompting you to answer specific questions about the kitchen you are designing. After you answer all the prompts, the kitchen design wizard draws and places all elements while you watch. Below is a description of each step.
STEP 1: Select room layout.
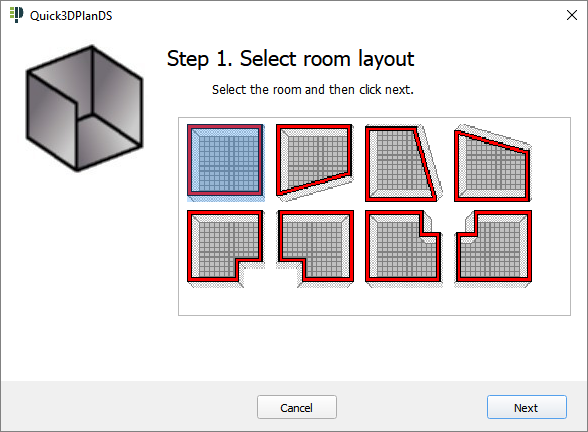
Select the desired room layout by clicking on it. Click on "Next".
STEP 2: Enter wall dimensions.
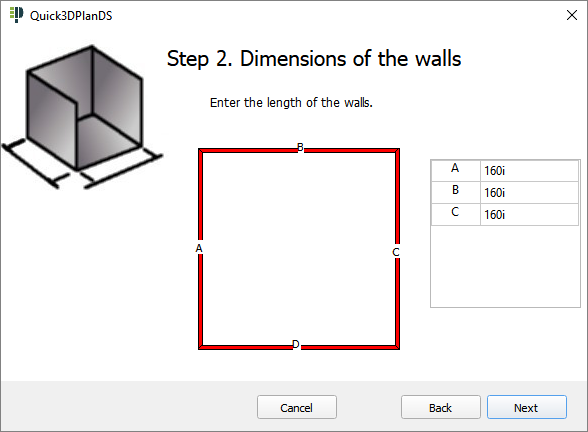
Each wall segment is assigned a letter (A, B, C,...). Enter the dimensions for each segment in inches. When finished, click "Next".
STEP 3: Door(s) and Window(s).

Indicate the total number of doors and windows. Click on "Next".
STEP 3': Door(s) and Window(s) dimensions and placement.
|
|
|
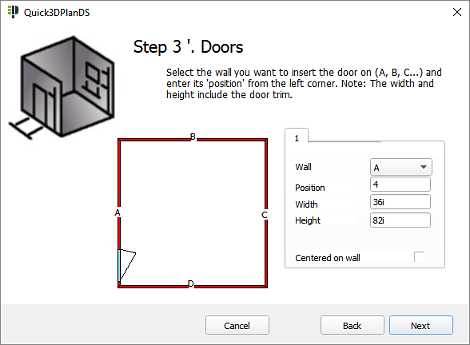
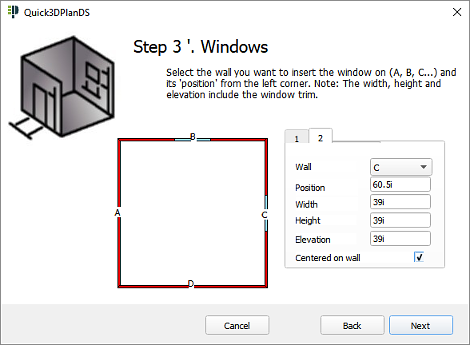
Enter the dimensions and position for each door and window. Remember that each wall segment is identified by a letter. The door and window position in each wall is always defined from left to right.
In addition to "wall segment" and "position", you also need to enter the "height" and "width" for each window and door. Remember that width and height dimensions need to include any trim or molding.
Windows also need an "Elevation" value. This is the distance from the floor to the bottom of the window. There is also an option to "center windows on a wall" automatically.
NOTE: If no window or door is selected, Step 3 will not appear in the Kitchen Design Wizard.
STEP 4: Select walls to furnish.
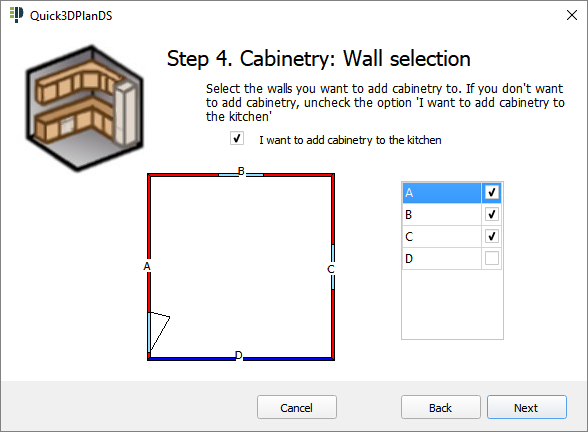
Selecting the option to furnish the kitchen will instruct the wizard to place cabinetry on all wall segments showing a check mark. If you decide to place the cabinetry manually, uncheck the option to furnish. This will show the kitchen layout and close the wizard.
STEP 4': Appliances and plumbing fixtures.
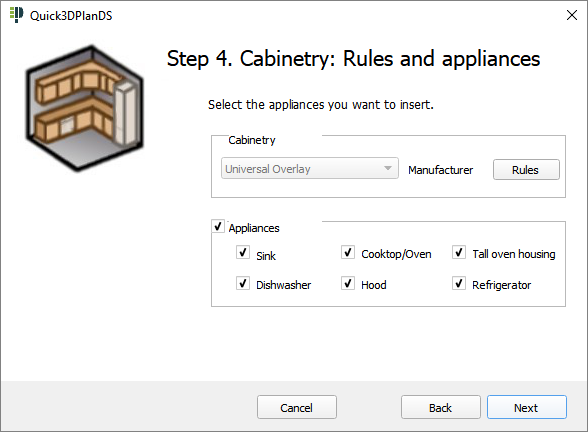
Make sure there is a check mark next to each appliance or fixture you would like placed automatically by the wizard. If you prefer to place any of these elements manually later on, remove the check mark.
|
|
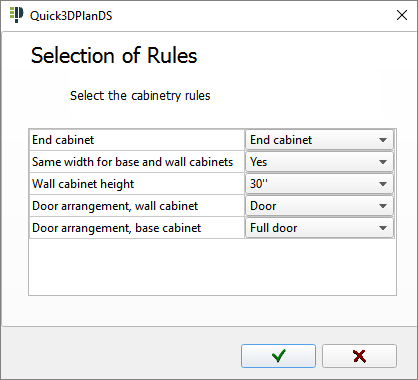
The "Rules" button opens up a window showing the criteria the wizard will follow when placing cabinetry, such as placing end cabinets versus end panels, sharing width for base and wall cabinets, and height of wall cabinets and door styles. You can alter these rules in this window. |
STEP 5: Corner cabinets and appliances. Select models, dimensions and position.
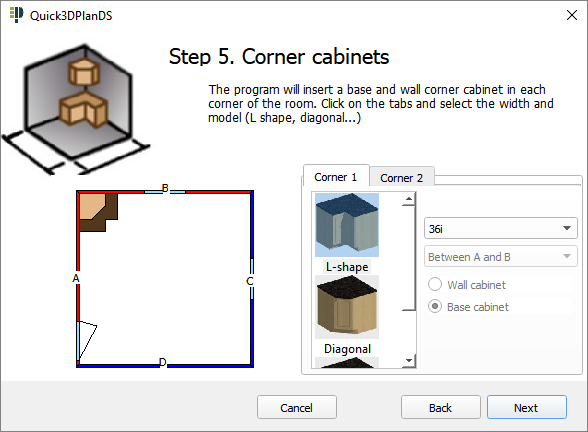
For each wall segment, the kitchen design wizard shows a preselected base and wall corner cabinet. You can change this selection and alter the dimensions of each cabinet. If any appliances were selected in the prior screen, the same options will apply.
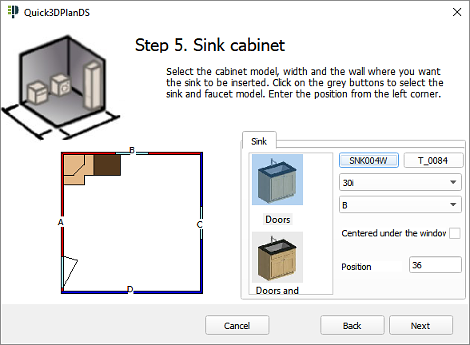
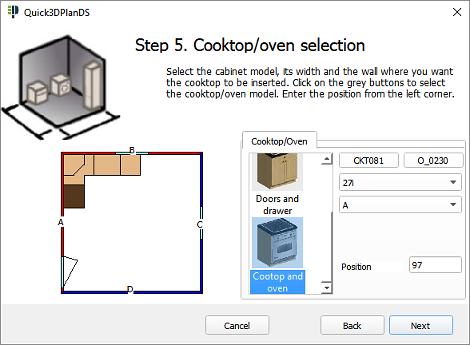
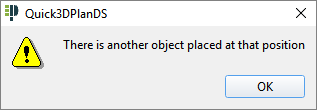
The preselected options may vary by appliance. In most cases you will be able to select model, dimensions, wall segment and position on that wall. If at any time the wizard identifies a placement conflict, the message below will appear:
Once you press the "Finish button", Quick3DPlan® DS will draw and place all elements based on your input.