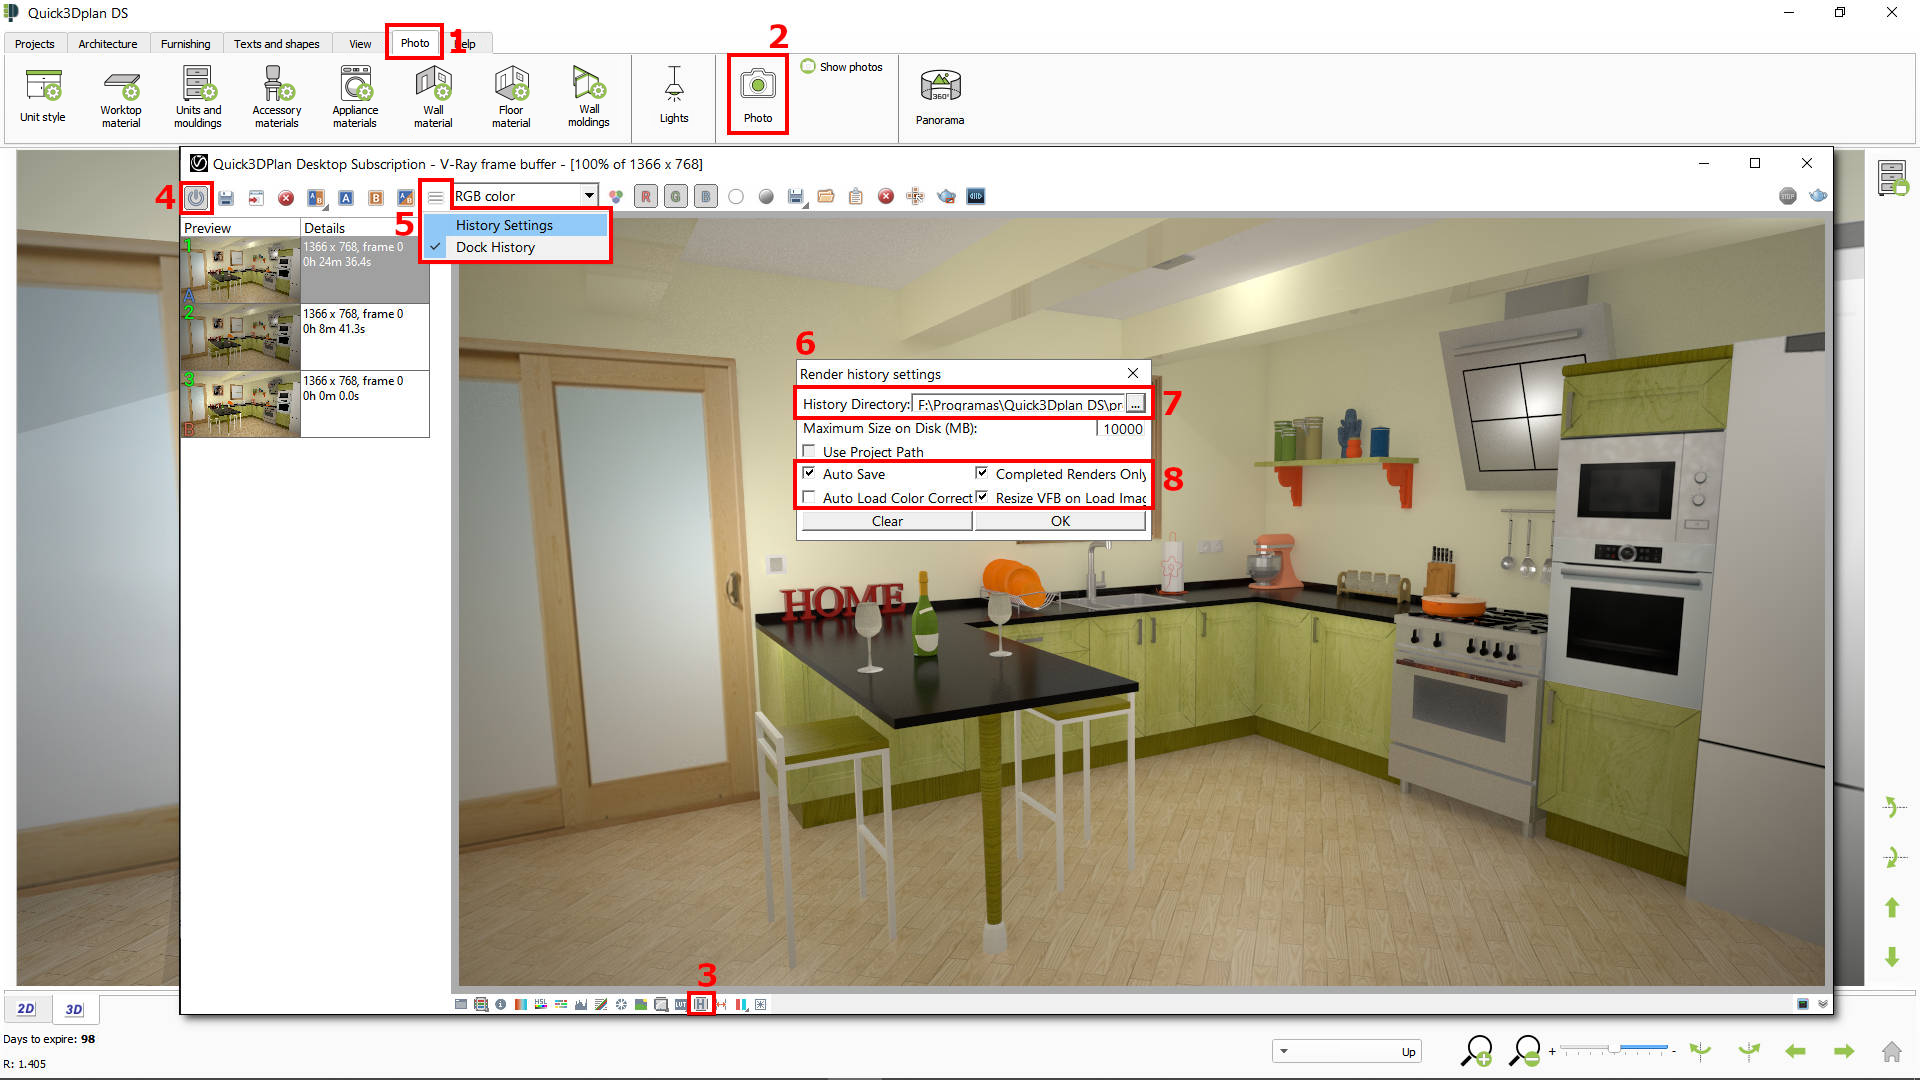
How to activate the V-Ray window history (*Only available in the latest Quick3DPlan® DS version).
After making your first render or photorealistic image, it is recommended to activate the render window history to see all the images you take with Quick3DPlan®. In order to do so, follow these steps:
- Click on the "Photo" tab.
- Click on the "Photo" option to take your first photorealistic image.
- In the new V-Ray render window, click on the “Show V-Ray VFB history window” option that appears in the lower toolbar.
- Click this button to activate history. (NOTE: Before continuing, first move the "V-Ray" window to the lower right corner of your screen, otherwise it will "cover" and you will not be able to see correctly the window indicated in point [6]. )
- Then click on “History Settings” to configure the history options.
- Window “Render history settings” will be displayed. (NOTE: As commented in point [4], If you cannot see this window right, you must close it from the lower Windows task bar, and move the "V-Ray window".)
- In this window you have to select the directory where the history photos will be saved. We recommend creating a new folder inside the "projects" folder of to keep these images separate from the rest of the design files. (For example, create this folder: "C:\Quick3DPlan\projects\Photos\History")
- Finally, check all these options and press OK to accept the changes.

