How to put a "ceiling scribe" cornice.
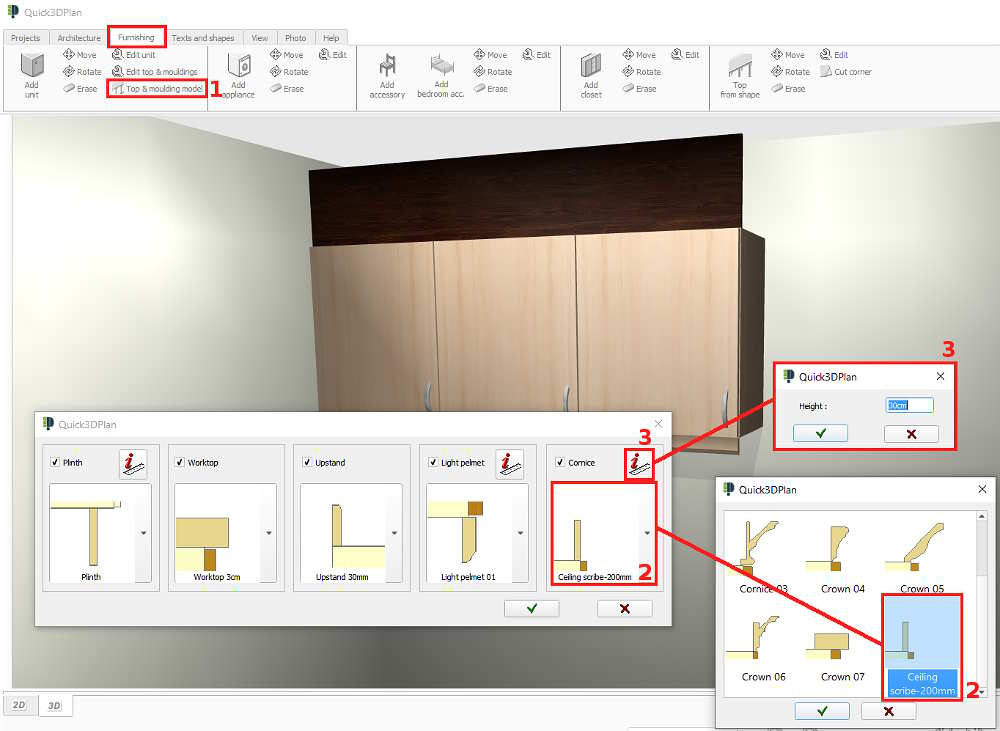
In order to put a "ceiling scribe" corner (*) in the wall units (*cornice that fits the gap between the top of a wall unit and the ceiling), follow these steps:
- Click on the "Furnishing -> Top & moulding model".
- Next, click on the "Cornice" section and select the "Ceiling scribe 200mm".
- Next, click on the "red i with a ruler" button and modify the cornice height:

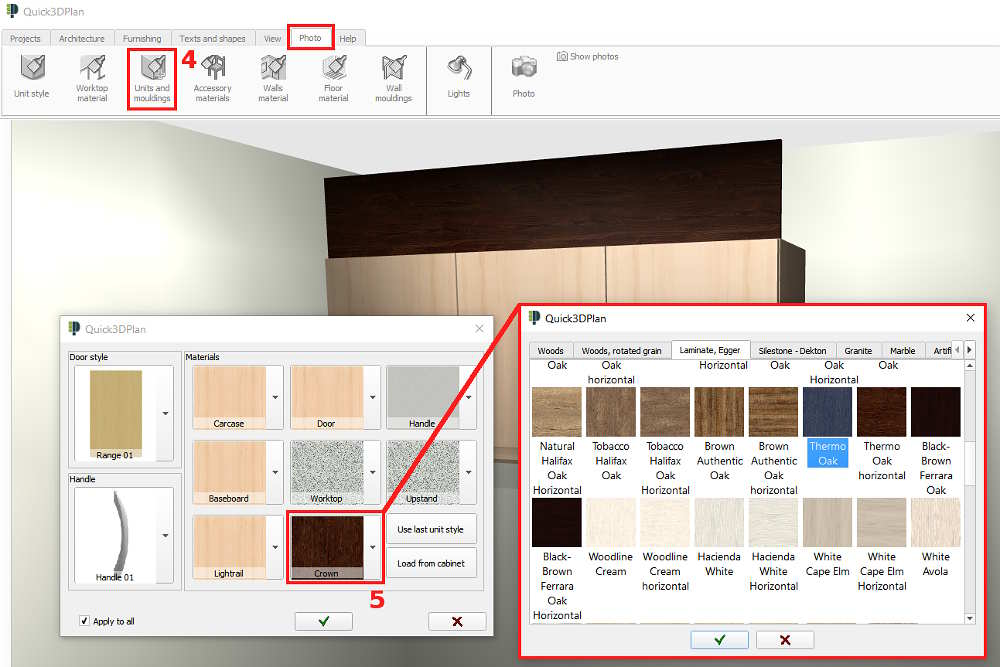
- To assign a material to the cornice go to the "Photo -> Units and mouldings" section.
- In the window below, click on the "Crown" section and select the new material:

