Quick3DPlan compatibility with Windows® Vista, Windows® 7, Windows® 8 or Windows® 10.
In order to run Quick3DPlan® on Windows® properly, please follow this tips:
- You must be the system administrator and have all the rights of the system.
- Make sure that your antivirus is not blocking the program.
- Do not open Quick3DPlan projects by double-click on them, always use the "Open Project" option inside Quick3DPlan.
- Update the program to the last version. To do that, go to "START -> PROGRAMS -> QUIK3DPLAN -> QUIK3DPLAN - CHECK FOR UPDATES".
- Make sure that your PC is virus, spywares, etc, free. Always make an optimal maintenance of your computer, update drivers, etc...
- Always start the program from the shortcut on the desktop or from "START -> PROGRAMS -> QUIK3DPLAN".
WINDOWS® 10 (*Screenshots are in spanish)
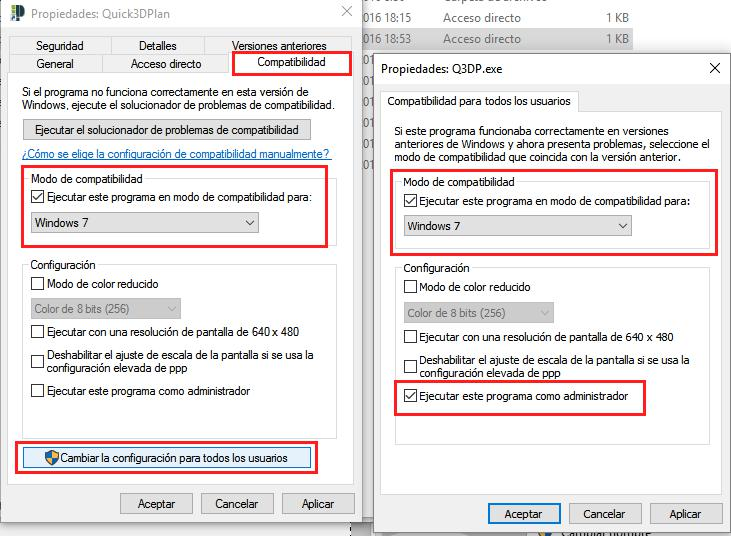
If you have Windows® 10, you may try to activate the option "Windows® 7 compatibility mode". If so, please follow these instructions (NOTE: the screenshots are in spanish):
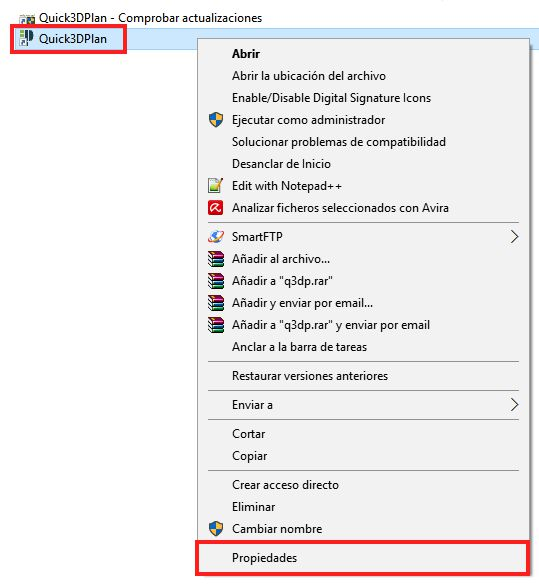
- Right click on the shorcut, and select "More -> Open file location":

- A window with the shortcut will come up, again righ-click on it, and select "Properties":

- Then, a new window comes up. Select the "Compatibility" tab, and then, configure the options as shwon below (finally, accept):

- Once you do that, the program will work properly.
WINDOWS® VISTA, WINDOWS® 7, WINDOWS® 8
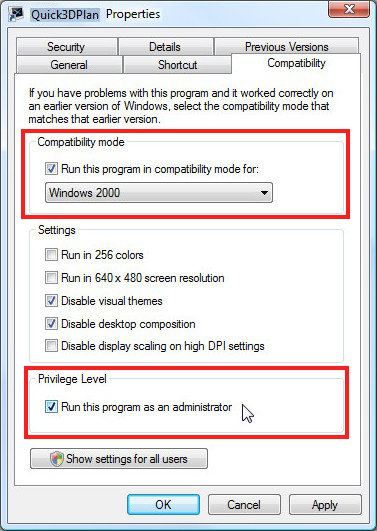
If you have Windows® Vista or Windows® 7 O.S., you need to run Quick3DPlan in "Windows® 2000 compatibility mode" (or "Windows XP compatibility mode" if you have Windows® 8). To do that, simply follow this steps:
- Right-click on the Quick3DPlan® shortcut icon on your desktop.
- Select "Properties".
- The "Quick3DPlan Properties" window opens.
- Click on the "Compatibility" tab, and select the same options as shown below.

- Once you do that, the program will work properly.
