
|
|
UNITS/CABINETS |

Here you can find the tools to insert, modify, move and delete units. It also includes commands to edit the moldings and worktop that have been inserted with the unit.


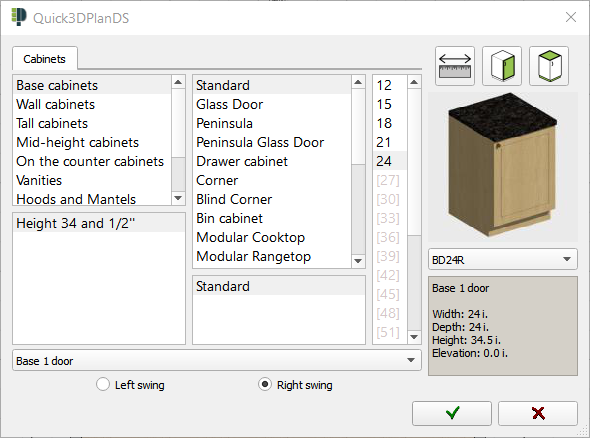
Click on this icon to open the following dialog, which contains all options related to cabinet selection, modification and insertion.
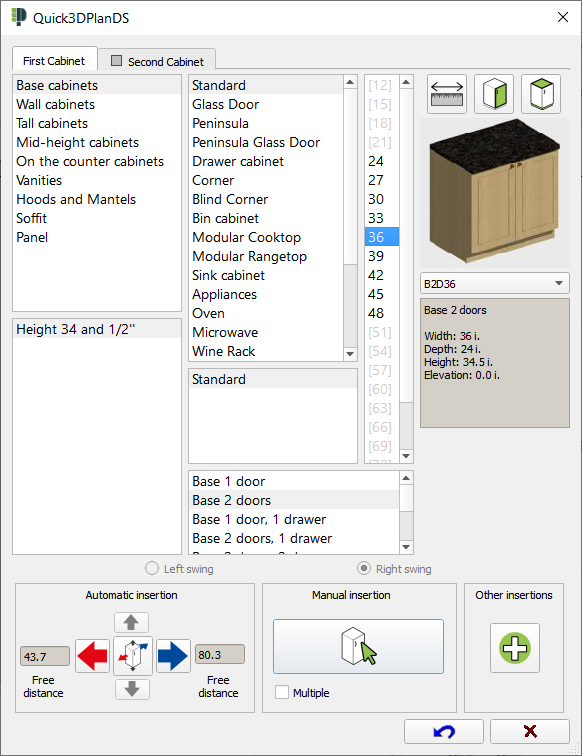
How to select a cabinet
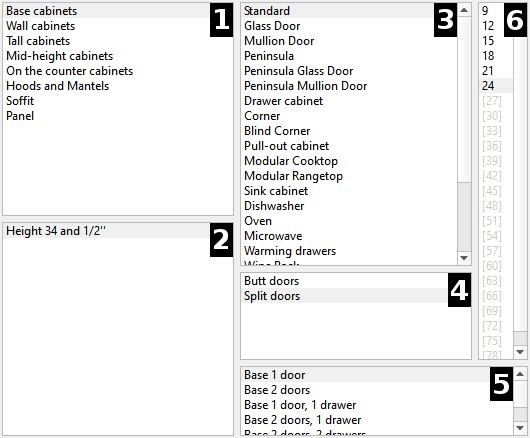
1) The first quadrant includes the cabinet type: Base, Wall, Tall ...
2) The second quadrant includes cabinet height.
3) The specific cabinet models within each cabinet type are included in space 3; Standard, corner cabinet, Wine Rack, etc. You need to scroll down the list to see the complete model inventory.
4) You can find sub models below. E.g.: L-shape corner, diagonal corner, blind corner, split versus butted doors ...
5) Below, you will find door combinations available for the cabinet selected: one door, two doors, one glass door, etc.
6) To the right there is a column with numbers. These are the standard widths available for each cabinet. The width is shown in two colors: black and grey. The grey width indicates that particular width is not available for that cabinet configuration, but it is available in a different configuration. For instance, a standard base with one door is not available in 27 inches but it is available in 27 inches with 2 doors.
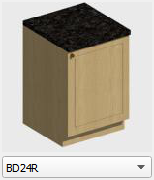
Below the cabinet graphic there is a pull-down menu for cabinet references or labels. Most people, however, prefer to select cabinets using the lists above.
How to place a base and a wall cabinet at the same time
At the top of the cabinet insertion window you will see two tabs: "First Cabinet" and "Second Cabinet".

The "First Cabinet" is always active. The "Second Cabinet" is not active by default, but can be activated by clicking on the small square. Once active, you can place two cabinets at the same time: A base and a wall.
There are two requirements for this function to work:
- The "Second Cabinet" window will only show the cabinets that can be placed above the "First Cabinet".
- The two cabinets need to be of the same width. The width can only be changed in the "First Cabinet" window.

Once the "Second Cabinet" is selected, you have to click on the tab "First Cabinet" to proceed with the cabinet insertion.
How to insert integrated appliances
When selecting a cabinet for an integrated appliance, the Cabinet Insertion Window will show a new tab next to the "First" and "Second Cabinet" tabs. When you click on the appliance tab, a list with the available appliances appears. These appliances can be Fridge, Cooktop, Range, Oven, Microwave, Hood Sink and Faucet.
If you do not want to insert the appliances automatically, then remove its check mark from the tab.

How to change the door swing
There are two small circles below the Door/Drawer configuration area to indicate the cabinet swing. Note that altering the swing does not change the cabinet picture. However, when you place it in your project, you will see the selected swing even if the picture stays the same:

On the right of the cabinet insertion screen there is a graphic for each cabinet. On top of the graphic there are three buttons (from left to right):
- Change cabinet dimensions.
- Select door/knob/handle model.
- Select molding model: crown molding and light rail for wall cabinets and baseboard, countertop and backsplash for base cabinets.
How to erase the last inserted cabinet
|
|

At any given time, you can erase the last inserted cabinet by clicking on the Undo button, located at the bottom of the cabinet insertion screen. You can click on Undo Cabinet as many times as cabinets you have inserted in the design. If the cabinet you need to erase is not the last one inserted, or the one selected as a new reference, it is quicker to erase the cabinet using the "Erase Cabinet" option.
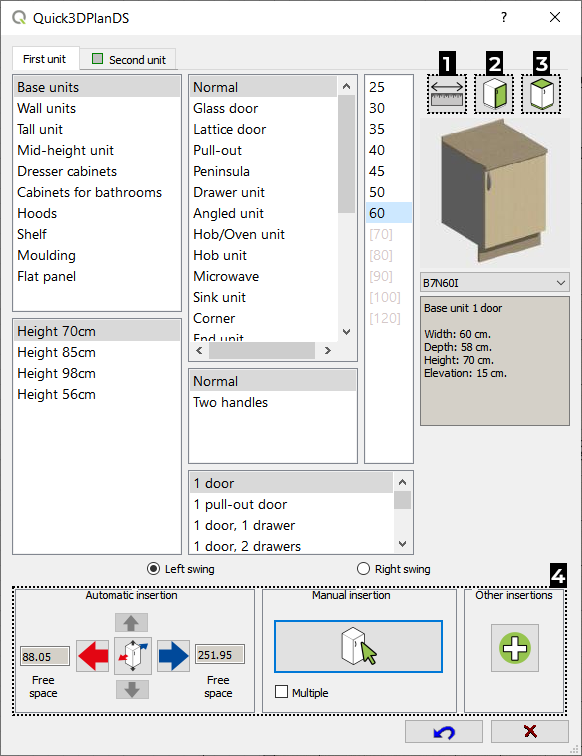
Other options available in the cabinet insertion window:
|
|
The remaining available options are: |


|
|
|

This icon modifies the dimensions of a particular cabinet in your design, or replaces it with a different model. It is best to use this tool in 2D mode. Clicking on this icon, the following message appears "Select unit or press ESC to cancel..." asking you to click on the cabinet you want to change. (NOTE: You can also change a cabinet by double clicking on it.)
Once the item is selected and the selection confirmed, the program will display the cabinet insertion window; a window very similar to the one you used to place the cabinet in question, earlier in the project. The difference is now that the only available insertion button is the green check mark.
In the Cabinet Insertion window, Quick3DPlan® DS will highlight the element to be changed. If the element was previously modified in any of its basic dimensions, Quick3DPlan® DS will not show you the modified dimensions upfront, but you will see them if you click on the icon with the "red i with the ruler".
If the modification you are about to introduce concerns the width of the item, you should ensure that there is enough space available around the cabinet for it to be altered in width. Otherwise the change may create a collision with the objects around it.
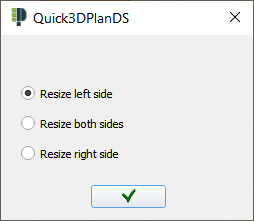
If you change the width of a cabinet, Quick3DPlan® DS will ask you if you want to resize the new cabinet to the right, to the left or both sides, to know in which direction to make the adjustment. If you reduce the width, use the "Move cabinet" command to close the gap from one of the sides. If what you want to do is exchange one cabinet for another, simply select the model you want from the list.
If there is not enough space, you may need to use the "Move item" option in order to move the items surrounding the object, and free up some space.
Click on the green check mark button to execute the modification  .
.
|
|
|
This tool allows you to change the position and/or the elevation of a unit / cabinet, appliance or accessory.
Once you click on this icon, the next message appears "Select object or press "ESC" to cancel...". The next step is to select the cabinet (or appliance / accessory) that you would like to move.
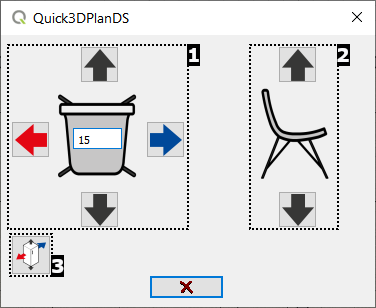
In this window we find the following options:
- The left image represents a chair viewed from the top with a field where you can enter the distance you want to move. The four arrow buttons are to move the cabinet / appliance / accessory forward, backward, left and right.
- The right image represents the cabinet / appliance / accessory viewed from the front. The two arrow buttons above and below it are to move the item up or down. To move the object, insert the value of the distance to be moved in the white box, and press the appropriate arrow button to indicate the direction of the movement.
- This option allows you to select a new cabinet (or appliance / accessory) that you want to move.
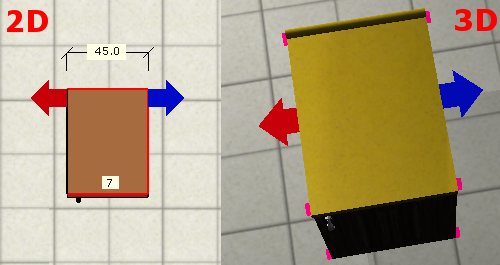
The actual orientation of the item might not be the same as the one shown in the window. To help you understand the direction in which the item will move, Quick3DPlan® DS shows a red and blue set of arrows. The movement will be done according to these colored arrows.
|
|
|
The Rotate function allows you to move an object around its rotation point.
Once you click on this icon, the next message appears "Select object or press "ESC" to cancel...". The next step is to select the cabinet, appliance or accessory that you want to rotate.
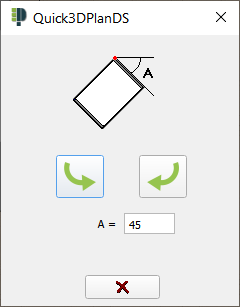
Inside this window, a box is shown with value "A =". The item will rotate with that angle.
The two arrows allow you to rotate the item clockwise or counter-clockwise around its rotation point.
|
|
|

This option allows you to add a returned moulding to a cabinet (crown molding, light rail, backsplash or baseboard) or to extend any sides of a countertop. Once you select this option, the program displays the message "Select cabinet or press ESC to cancel...". Click on the cabinet whose moulding or countertop you want to modify.
Depending on the selected cabinet, Quick3DPlan® DS will show different options:
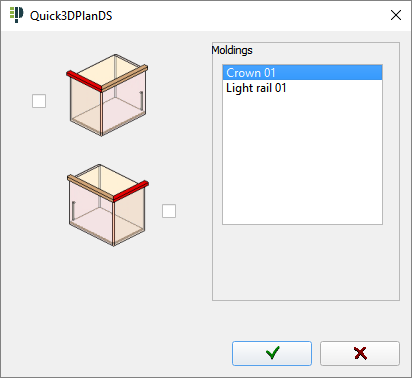
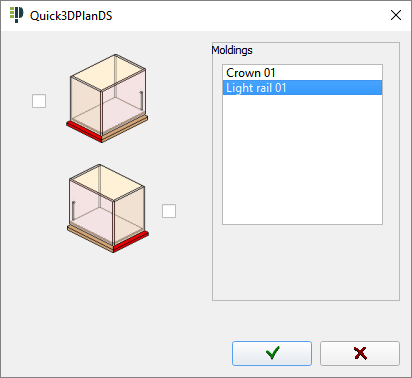
- Wall cabinet: The following window opens. Select the moulding that you want to modify (crown moulding or light rail) and the side of the cabinet. Click the "green check mark" () to apply the changes.
|
CROWN MOULDING/CORNISE
|
|
LIGHT RAIL/LIGHT PELMET
|
- Base cabinet: The following window opens to select the moulding that you want to modify (backsplash or plinth) and the side of the cabinet. You can also modify the countertop by clicking on any of the four check marks to extend the countertop forward, backward, left or right. You can enter a different value for each option. Click the "green check mark" () to apply the changes.
|
COUNTERTOP/WORKTOP
|
|
BACKSPLASH/UPSTAND
|
|
TOE KICK/PLINTH
|
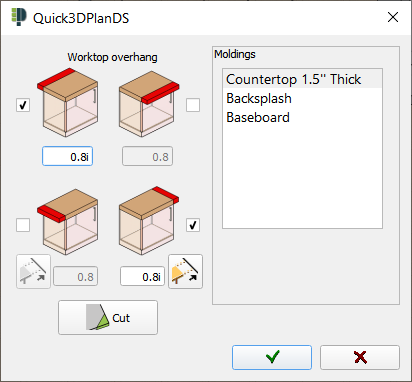
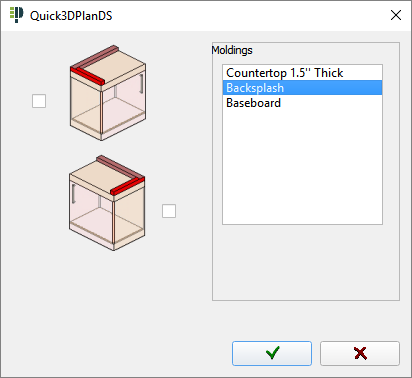
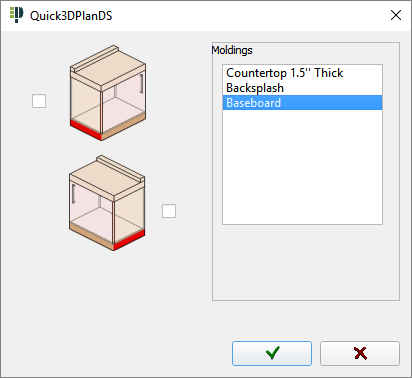
You will find additional options for worktops:
 This option allows you to extend a worktop to a wall. If you click on this option, select the wall you want to extend and the program will extend the worktop automatically.
 This option allows you to make a "curved cut" or a "diagonal cut" on a selected worktop. After clicking on this button, a window will appear where you will be able to select the corner to be cut (marked with a red point) and select the type of cut and its measures at the bottom of the dialog:
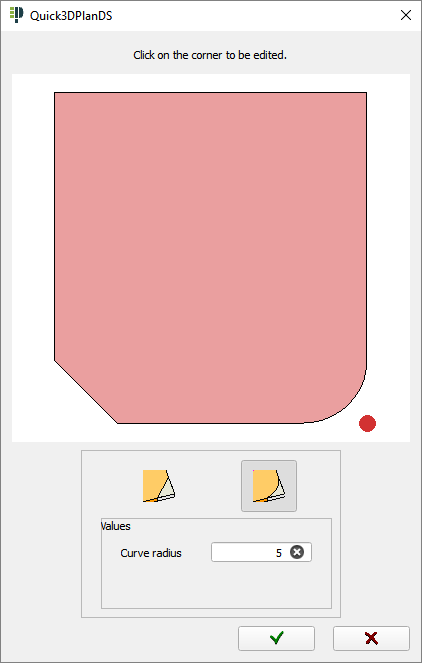
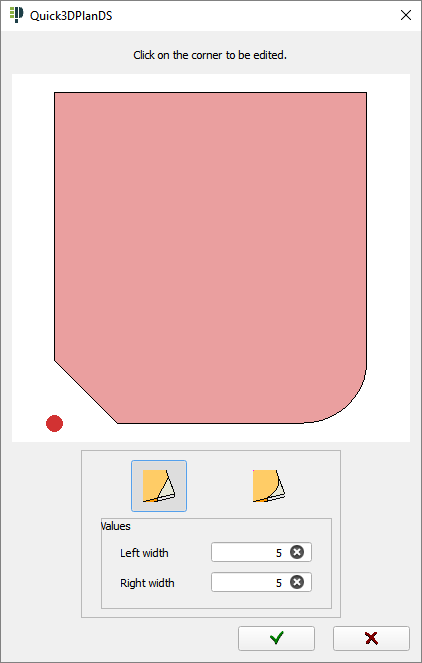
To undo a cut, click on the corner and deselect "the type of cut" button to eliminate it.
|
|
|

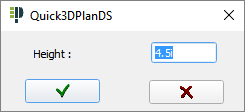
After clicking on this option, the next window appears to select the moulding models and/or modify their height:
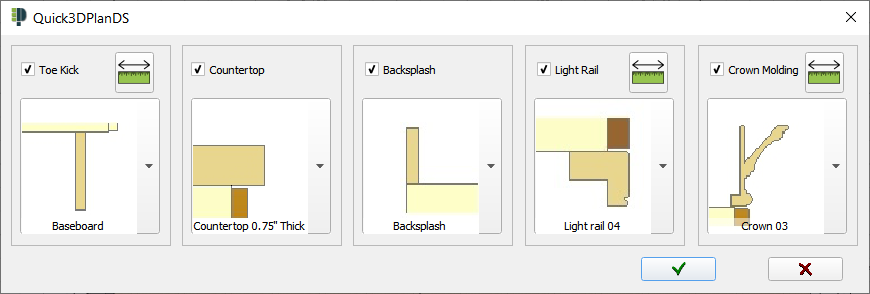
Click on the moulding image to see all the available models in "thumbnails". Click on a model to select it.
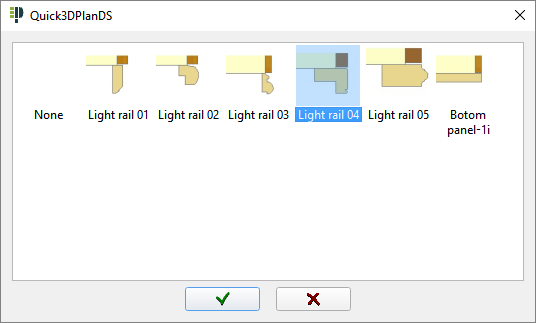
Click on the green checkmark to apply the changes.
 To change the moulding height, click on the button with a red "i" and ruler.
|
|
|
The Erase object function allows you to erase any object in the design except external walls.
After clicking on this icon, the following message appears "Select object or press "ESC" to cancel...". Once you have selected the object that you want to erase, the following message is shown:

Click on "Yes" to erase the object.
|
|
|