
|
|
ACCESSORIES AND BEDROOMS |

Here you will find the tools to insert, edit, move and delete the accessories, the elements of the bedroom catalog and the bathroom catalog.


Allows you to insert accessories in the design in the same way we explained for cabinets.
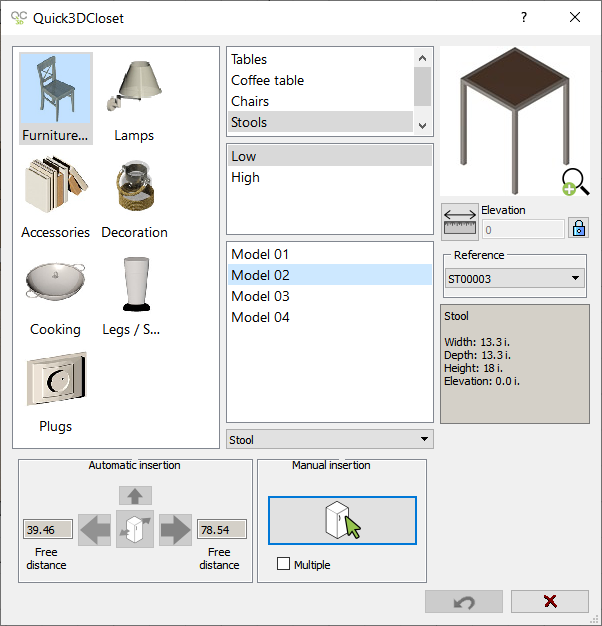
The left column shows different categories. The centered areas contain different classifications of accessories within each category. The last level is for materials or finishes.
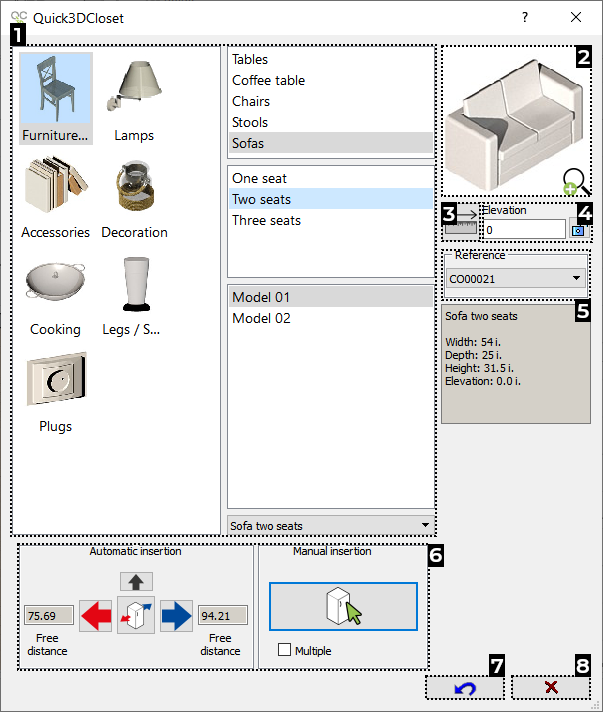
In the item insertion window, we find the following options:
- List of Items: Here you can find the various available items organized by categories and subcategories.
- Preview: Here, an image of the item we are selecting is displayed.
 Click on this image to see all the elements in thumbnails.
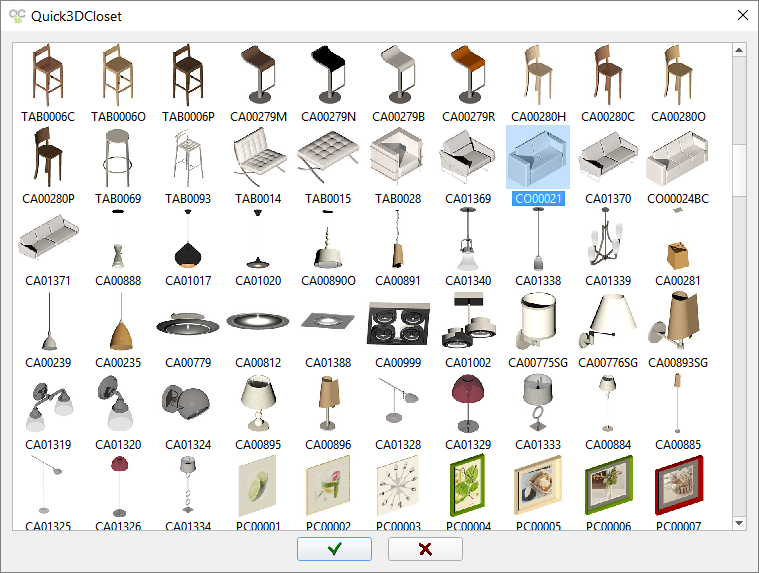
Once you've found the element that you want to insert in the drawing, click on it and then on the check mark  to accept the selection.
|
|
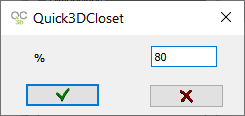
NOTE: Click on the "Percent change" option to edit the "Width", "Depth" and "Height" values with a percentage:
|

- Elevation: Click here to modify the "Elevation" value of the accessory at the moment of insertion. (

 ) The padlock will let you "lock" that elevation for future insertions of other accessories.
- Reference: In this dropdown menu, it will be possible to select an accessory directly by knowing its reference.
- Item Insertion: Here you will find the different options for inserting accessories. See the "Accessories insertion".
- Undo: At any given time, you can erase the last inserted accessory by clicking on the "Undo button", located at the bottom of the Accessory Insertion screen. You can click on Undo as many times as accessories you have inserted into the design. If the accessory you need to erase is not the last one inserted, or the one selected as a new reference, it is quicker to erase the accessory using the "Erase Accessory" option.
- Close: Close the accessory insertion window without doing anything.
|
|
|


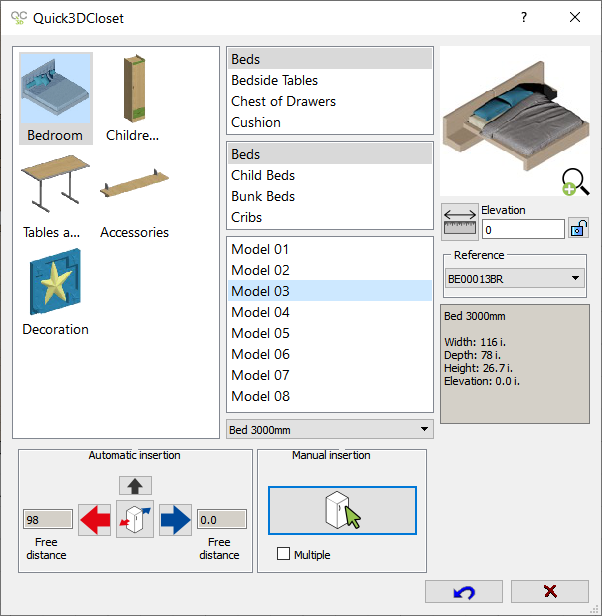
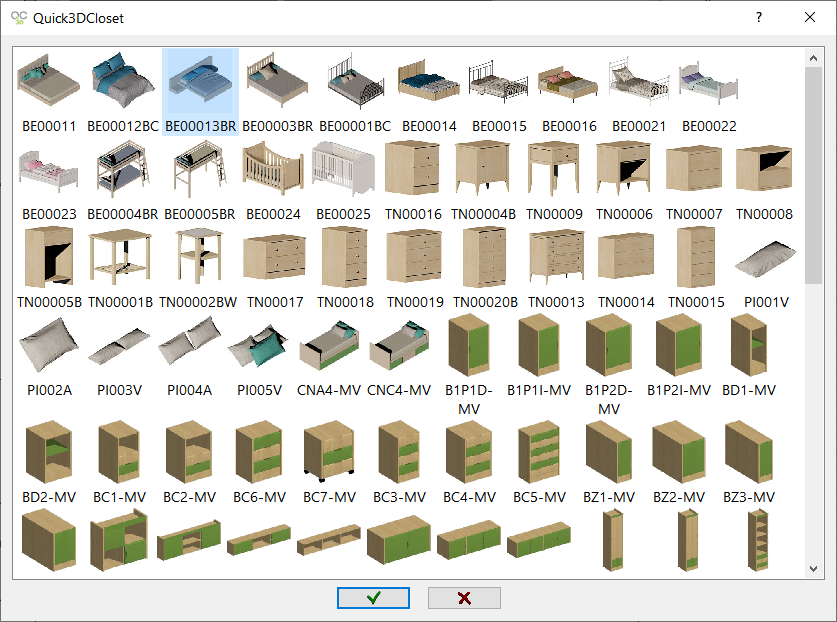
This option allows insertion of the elements of the bedroom catalog like beds, bunk beds, nightstands, dressers, columns, tables, chairs, shelves, toys, etc. The selection of the elements is made with the square window by clicking in any of the previous icons.
|
|
Note: Clicking in this image allows viewing the thumbnails of all available models. After selecting the model you just have to click on |
|
|
|


Same options shown in the previous step will appear here. "Change measures" of the element and "insert options".
|
|
|
This tool allows you to modify the dimensions of an accessory or cabinet previously placed in the design, or to replace it for another. Once you click on this tool, Quick3DCloset® will prompt you to select the accessory/cabinet. After clicking on it, the window below will be shown. (NOTE: You can also change an accessory by double clicking on it.)
|
|

|
|
|
This tool allows you to change the position and/or the elevation of a unit / cabinet, appliance or accessory.
Once you click on this icon, the next message appears "Select object or press "ESC" to cancel...". The next step is to select the cabinet (or appliance / accessory) that you would like to move.
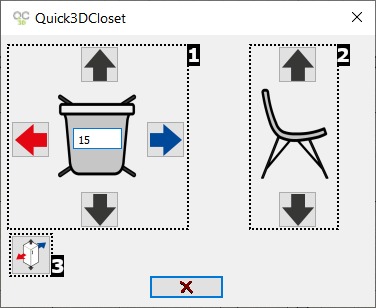
In this window we find the following options:
- The left image represents a chair viewed from the top with a field where you can enter the distance you want to move. The four arrow buttons are to move the cabinet / appliance / accessory forward, backward, left and right.
- The right image represents the cabinet / appliance / accessory viewed from the front. The two arrow buttons above and below it are to move the item up or down. To move the object, insert the value of the distance to be moved in the white box, and press the appropriate arrow button to indicate the direction of the movement.
- This option allows you to select a new cabinet (or appliance / accessory) that you want to move.
The actual orientation of the item might not be the same as the one shown in the window. To help you understand the direction in which the item will move, Quick3DCloset® shows a red and blue set of arrows. The movement will be done according to these colored arrows.

|
|
|
The Rotate function allows you to move an object around its rotation point.
Once you click on this icon, the next message appears "Select object or press "ESC" to cancel...". The next step is to select the cabinet, appliance or accessory that you want to rotate.

Inside this window, a box is shown with value "A =". The item will rotate with that angle.
The two arrows allow you to rotate the item clockwise or counter-clockwise around its rotation point.
|
|
|
The Erase object function allows you to erase any object in the design except external walls.
After clicking on this icon, the following message appears "Select object or press "ESC" to cancel...". Once you have selected the object that you want to erase, the following message is shown:

Click on "Yes" to erase the object.
|
|
|