WORKING AREA: PRICES
In this screen you can make the budget for the wardrobe, as well as export it to Excel format and print it.
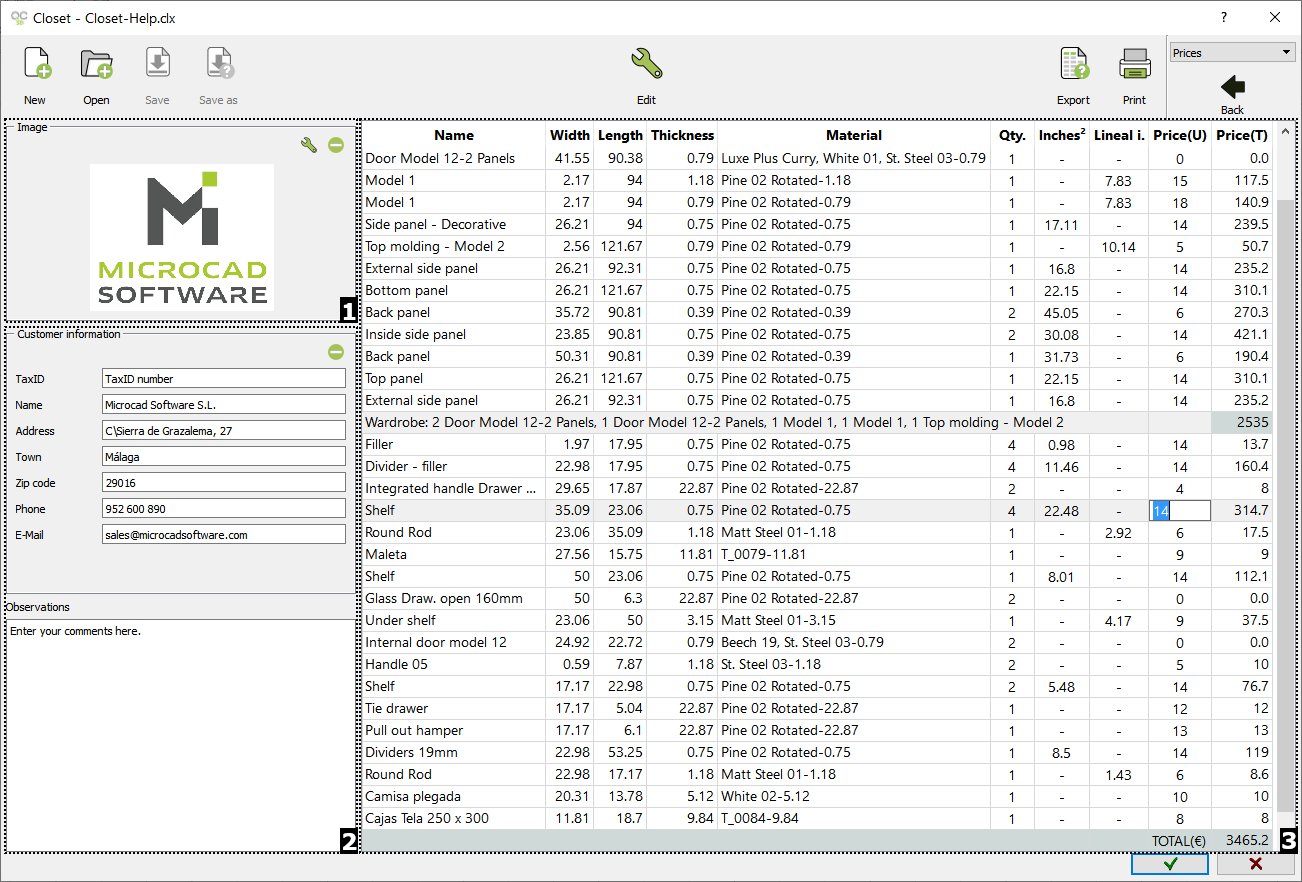
1)IMAGE
You can add an image or logo to our budget by clicking on the ( ) button. A Windows explorer will open where you can select the .BMP file. Press the (
 ) button to delete the previously selected image.
2)CUSTOMER INFORMATION AND OBSERVATIONS
Add the customer info (TaxID, Name, Address, Town, Zip code, E-mail), as well as some "Observations". Click on the ( ) button to delete all the information
3)LIST OF CLOSET PARTS
On the right side you can find a list with all the parts and elements that make up the wardrobe, as well as their measurements, materials, quantity, etc. Enter the price by double-clicking with the left mouse button on the "Price (U)" field.

ICONS MENU
The following options will be activated in the "Prices" view:
|
|
EDIT: Here you can set the "Price list options" to be shown in the impression:
Here you can find the following options:
|

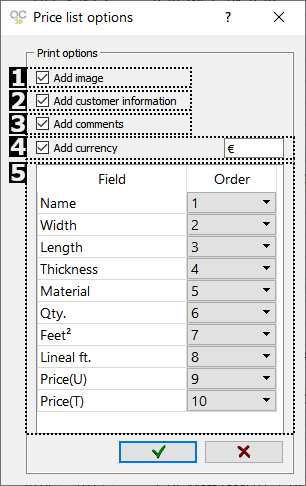
|
|
EXPORT: Click here to export the prices list to an Excel format. Simply, after clicking on this button, your Excel (or the Spreadsheet program that you have installed) will open with the list of the wardrobe elements and the "Customer Information". |

|
|
PRINT: Click here to print the prices list with the selected options in the "Edit" button where you can select the printer, number of copies, etc:
|

