WORKING AREA: DOORS
Here you can setup the number and distribution of the doors, handle models, panel sizes and the materials of each part of the doors.
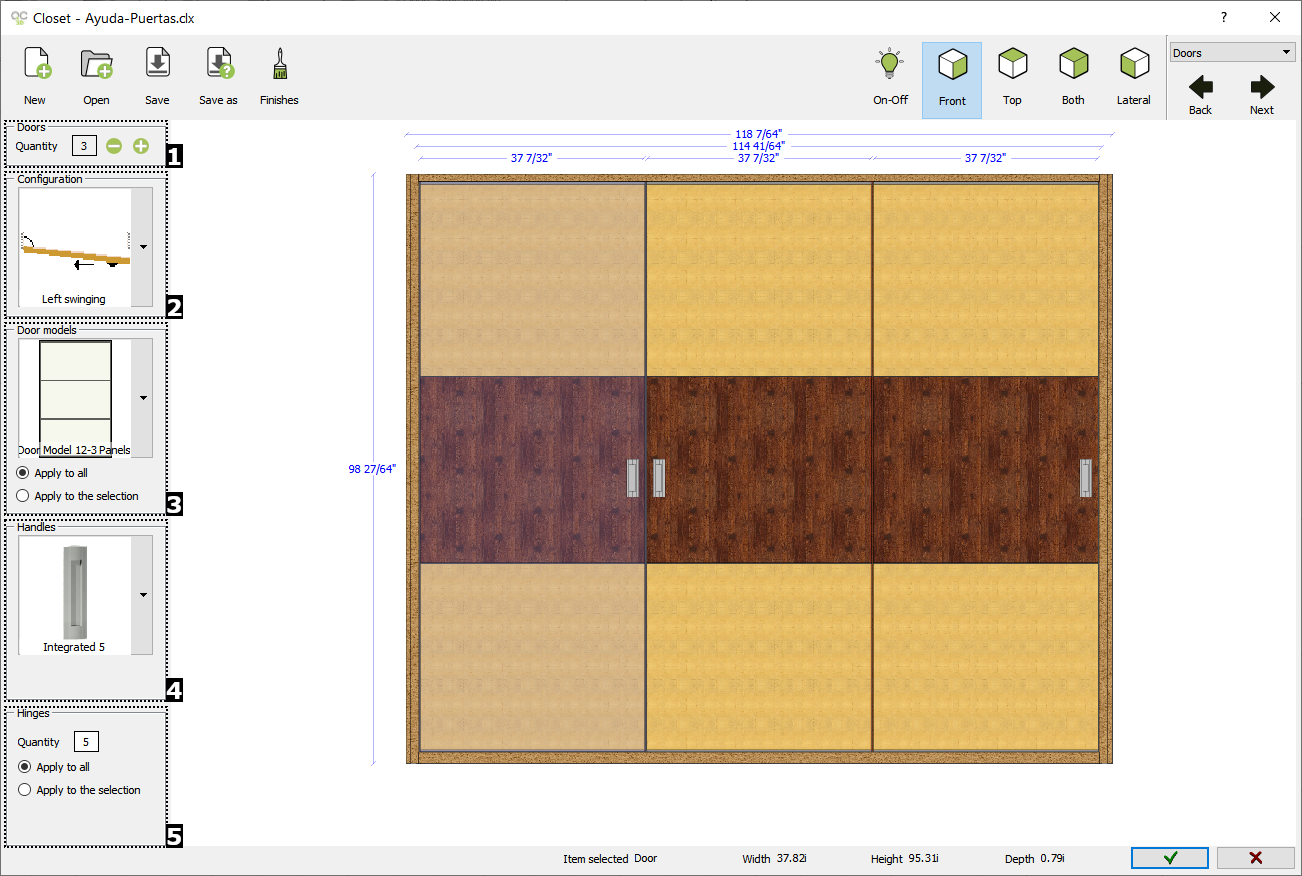
1)DOORS
This menu shows the number of doors ("Quantity").
|
 
|
Use the buttons "+" and "-" to increase or decrease the number of doors in case they are swing doors. When using the "swinging" doors, the number of doors is restricted to the number of closet modules.
|
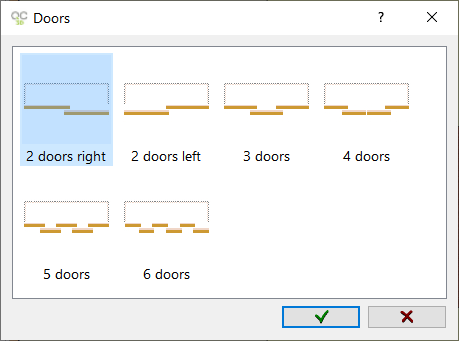
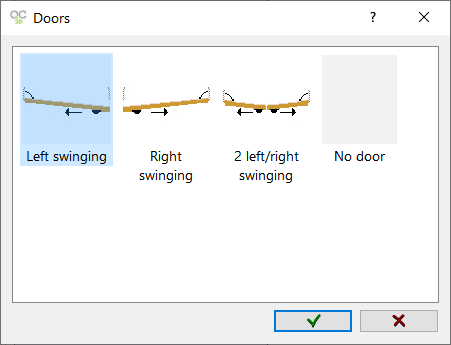
2)CONFIGURATION
In this section you can select door configurations. Click on the image or the "pencil" icon to show the different configurations of the available doors depending on the selected catalogue: sliding or folding:
|
Sliding
|
Swinging
|
|
|
|
As you select the door type, the image below will be updated in order to see a preview.
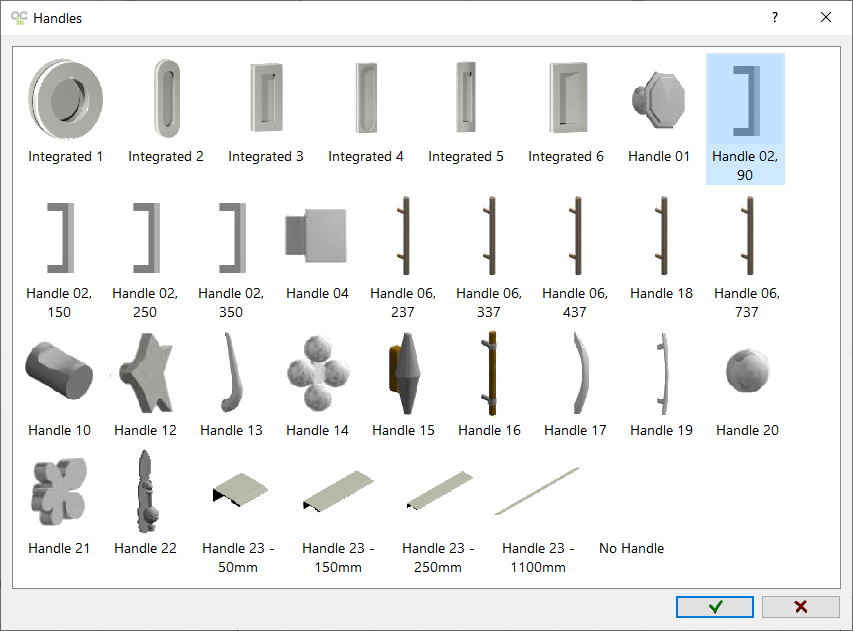
3)DOOR MODELS
Click here to select the model of the door. Click on the image to see the available models:
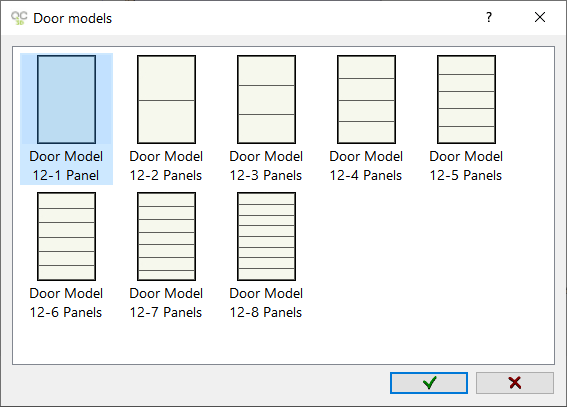
Select the new model and click on the accept icon to apply changes. If "Apply to all" is selected, all doors will be modified. If "Apply to selection" is selected, the changes will be applied to the doors you selected in the previous step. In the case no door has been selected, the following window will appear:
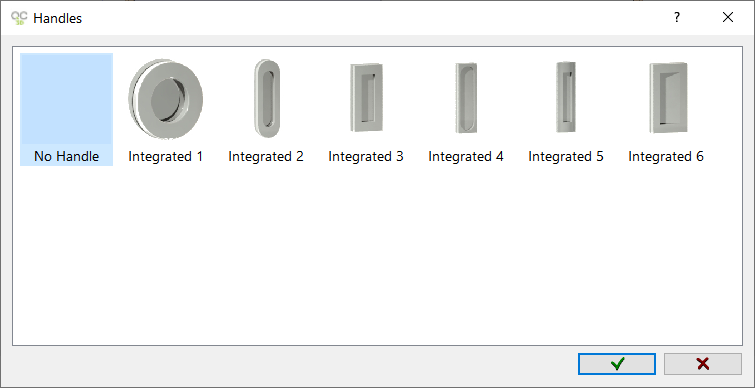
4)HANDLES
Click here to select the handle models. The handle type will depend on the door model whether they are "Sliding" or "Swinging":
|
Sliding
|
|
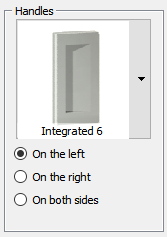
In the case "Sliding" doors are selected, you can select the handle position on the door. Click on the closet preview and select the handle position, "On the left", "On the right" or "On both sides".
|
|
|
Swinging
|
|
In the case of "Swinging/Folding" doors, the handle position is determined by the opening of the doors.
|
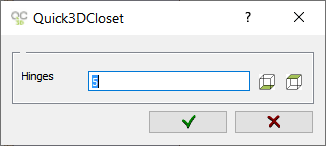
5)HINGES
In this section it will be possible to select the number of "Hinges" that the "Swinging/Folding" door will have. It will be possible to change the number of Hinges for the selected door (checking the "Apply to the selection" option) or for all (checking the "Apply to all" option). The following window appears where you can set the number of hinges:
ICONS MENU
In the icons menu at the top, the following options will be activated in the "Doors" stage:
|
 FINISHES: This tool allows us to assign the materials to each part of the doors. When you click on this button, the following window appears: FINISHES: This tool allows us to assign the materials to each part of the doors. When you click on this button, the following window appears:
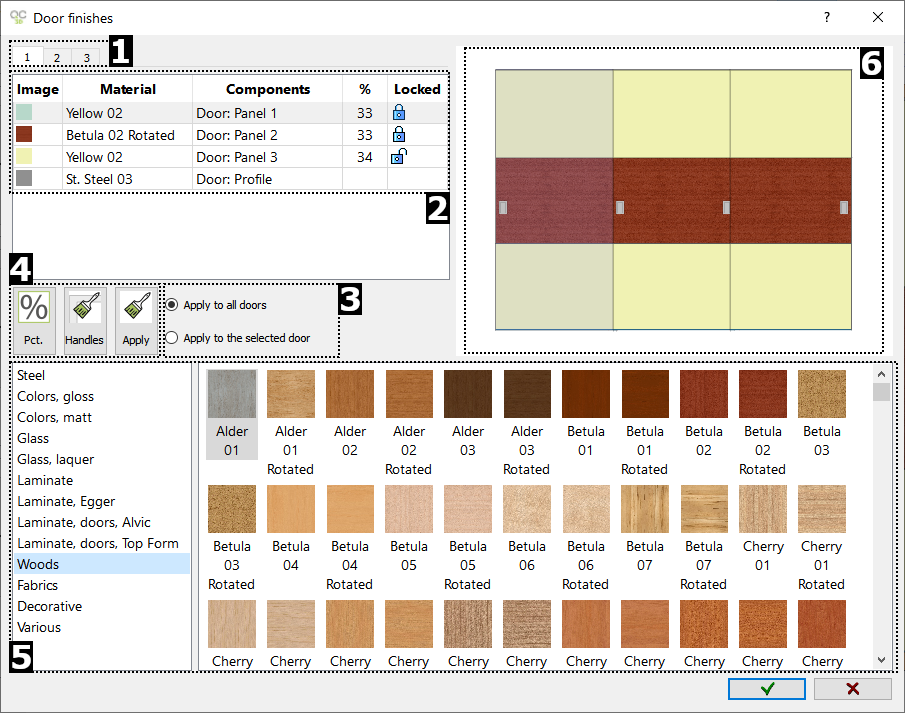
The available options are:
- Door tabs: The number of wardrobe doors is indicated at the top in order to apply materials to each door independently.
- List of door parts: Under the tabs, there is a list that indicates the number of panels, the percentage of space each door occupies and the material of each part of the door. When you select each part of the door, the list of materials to be applied is shown below [5]. You can select two parts simultaneously by using the "Control" key.
- Apply to all selected doors: Click here to select whether the changes will be applied to all doors or only to the one selected (the active tab).
- Panel percentage, handle material, apply material: There are 3 buttons whose functioning we will look at next. (NOTE: These options will be enabled or not, depending on the door type and handle selected):
|

|
Click here to change the percentage occupied by each panel in the door: Select the panel and the space where the percentage ("%") appears and introduce the new percentage you want the panel to occupy and click on the accept button ( ). ).
|
|

|
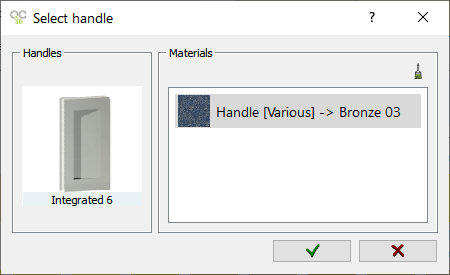
Handles: Click here to change the handle material:
|
|
 Click here to see the available handle materials and select one from the window: Click here to see the available handle materials and select one from the window:
|
|
|
|

|
Apply selected material: Click here to apply the selected material in the "list of materials" [5] on the selected part of the closet in the "list of wardrobe elements" [2] (NOTE: You can also change the material by double clicking on it.)
|
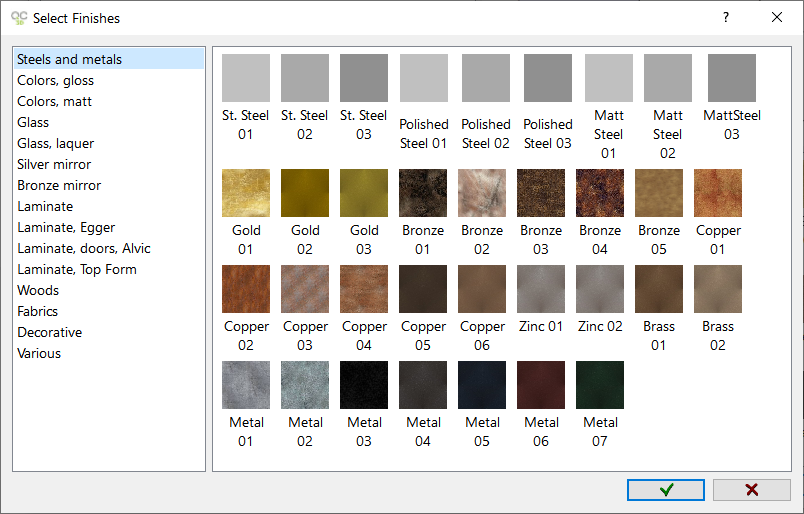
- List of materials: The list of materials to be applied to each part of a selected door [2] will be shown in the lower part of the window. If no door element has been selected, no material will be shown.
- Preview of the doors: The "Preview" of the wardrobe doors is in the right side of the window, where you can see the changes applied. You can also click on each door to see the preview.
|
|
 OPEN THE DOORS (SLIDING DOORS): This button allows you to show the closet doors open in order to see the closet interior in 3D. The closet doors need to be "Sliding Doors”. When you click this button, you will see the window below: OPEN THE DOORS (SLIDING DOORS): This button allows you to show the closet doors open in order to see the closet interior in 3D. The closet doors need to be "Sliding Doors”. When you click this button, you will see the window below:
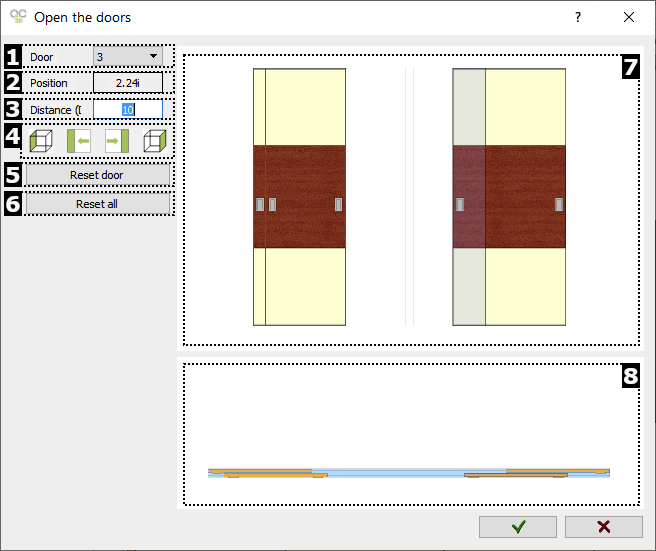
These are the options available in this window:
- Door: Select the door you want to open via the pull down menu. You can also select the door by clicking on the door itself. [7] [8].
- Position: Shows the distance from the door to the left side of the closet.
- Distance: Enter the value the open door will slide.
- Opening options: Here are the different options available to open the door:
|

|
Minimum: Moves the door the minimum possible distance to the left.
|
|

|
Change (Left): Moves the door to the left the distance entered in [3].
|
|

|
Change (Right): Moves the door to the right the distance entered in [3].
|
|

|
Maximum: Moves the door the maximum possible distance to the right.
|
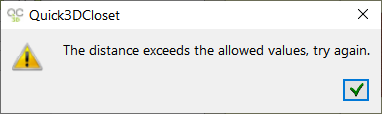
If the values entered exceed the allowed or workable limits, the message shown below appears:
- Reset Door: Resets the selected door to its original position.
- Resets All: Resets all closet doors to their original position.
- Door preview (Elevation): Shows doors in elevation view.
- Door Preview (Floor plan): Shows doors in floor plan view.
|
|
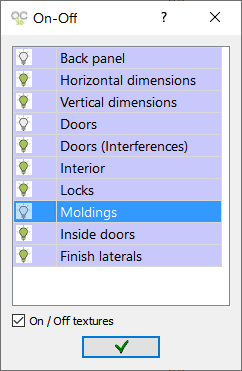
 FILTER: It allows you to apply a filter to the view. A window appears to select which items of the wardrobe you want to display (show / hide). FILTER: It allows you to apply a filter to the view. A window appears to select which items of the wardrobe you want to display (show / hide).
|


