Annex: How to activate the V-Ray window history
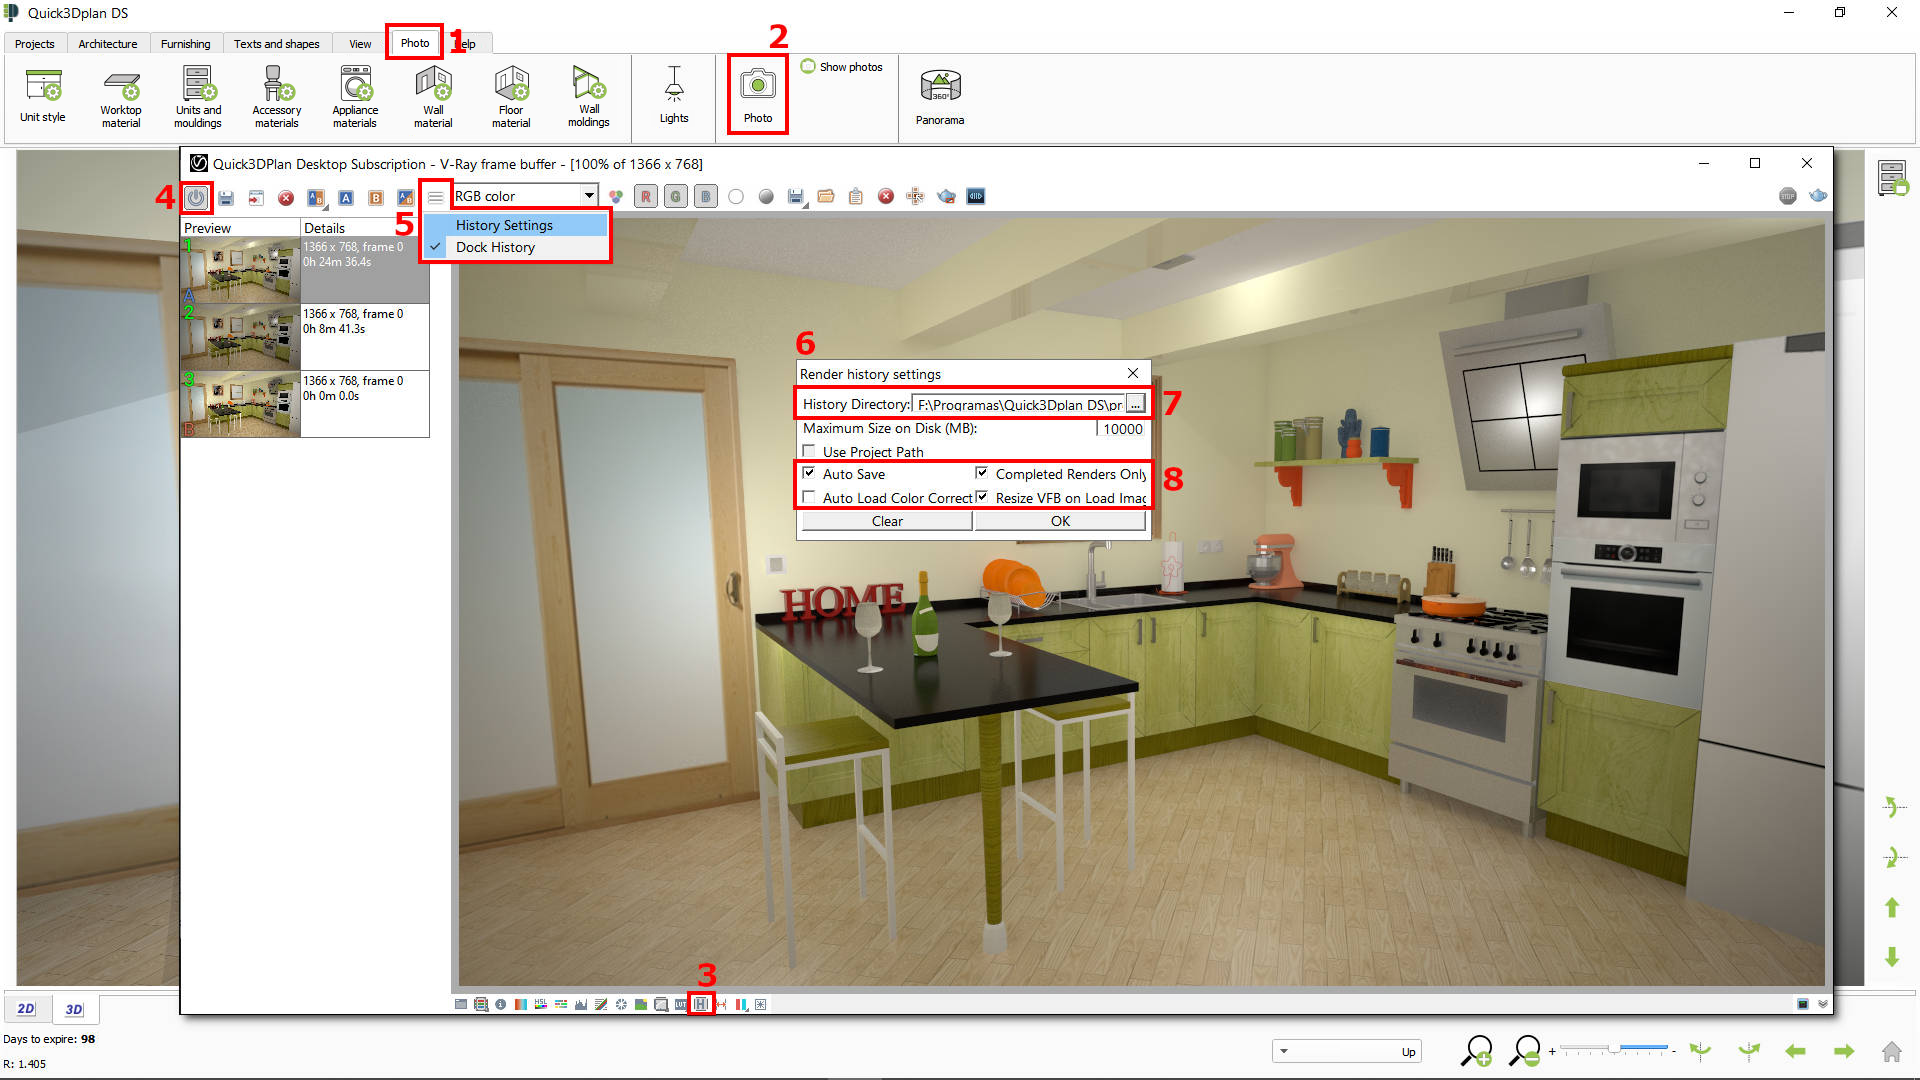
After making your first render or photorealistic image, it is recommended to activate the render window history to see all the images you take with Q3DP. In order to do so, follow these steps:
- Click on the "Photo" tab.
- Click on the "Photo" option to take your first photorealistic image.
- In the new V-Ray render window, click on the “Show V-Ray VFB history window” option that appears in the lower toolbar.
- Click this button to activate history. (NOTE: Before continuing, first move the "V-Ray" window to the lower right corner of your screen, otherwise it will "cover" and you will not be able to see correctly the window indicated in point [6]. )
- Then click on “History Settings” to configure the history options.
- Window “Render history settings” will be displayed. (NOTE: As commented in point [4], If you cannot see this window right, you must close it from the lower Windows task bar, and move the "V-Ray window".)
- In this window you have to select the directory where the history photos will be saved. We recommend creating a new folder inside the "projects" folder of Quick3DPlan® DS to keep these images separate from the rest of the design files. (For example, create this folder: "C:\Quick3Dplan DS\projects\Photos\History")
- Finally, check all these options and press OK to accept the changes.

