|
|
WALLS MATERIAL |
When you click on this button, the next window appears, where you can select the material for the walls. Clicking on "Apply to all", the material will be applied to all walls.

- Families: The tabs will show different categories of materials. The materials available in each of these categories will appears in the main window.
- Angle: To indicate the angle in which you want to place some materials, such as tiling.
- Dimensions: To indicate the size of the tiles, bricks, etc.
- Apply to all: This option is available for walls. Uncheck the "Apply to all" option to change the material of only one wall. The program will ask you to click on the wall that you want to change.
- Accept: By pressing this button, the new material will be applied to all walls, partitions and pillars. If the option "Apply to all walls" is not checked, you can select one wall segment to apply the new material.
- Cancel: Closes the "Material Selection Window" without making any changes.
|
|
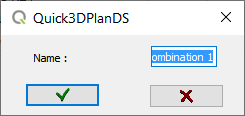
This button opens a new dialog to create a combination of materials to be applied to walls and partitions.

On the right side we can see a preview of the combination of materials that we are creating. On the left side it shows a list with the selected materials and their height (NOTE: On a new session, the combination of materials is in blank. Once you have created a new combination it will available until we close the program).
On the top of the dialog you can find the following buttons:
|
|
|
|
|
|
|
|
|
|
Once the material combination has been created, click on the green check mark ( ) to apply it to all walls, partitions and pillars. If you have disabled the option "Apply to all walls" the program will ask you to select a wall segment.


