AVAILABLE OPTIONS IN THE ELEMENT INSERTION WINDOWS
When placing any element in the interior of a wardrobe (shelves, drawers, doors, bars, accessories, etc.), an element insertion window appears to set up its features. The image below shows the "Basic drawers with handles" insertion window:

Available options depends on the element to be inserted. All the insertion windows have a "preview" of how the element will be distributed in the selected space. Available options of these insertion windows are described below:
 Modify Height: Allows you to enter a value for the insertion height manually instead of selecting it from a list of predefined values.
 Modify value: Allows you to enter a value manually instead of selecting it from a list of predefined values. Depending on the element you are inserting, you will be able to indicate several distances like "Distance to the back", "Depth", "Move from the front", among others.
|
The following window will appear in both options to introduce the value:
|
|||||
|
|
|
||||
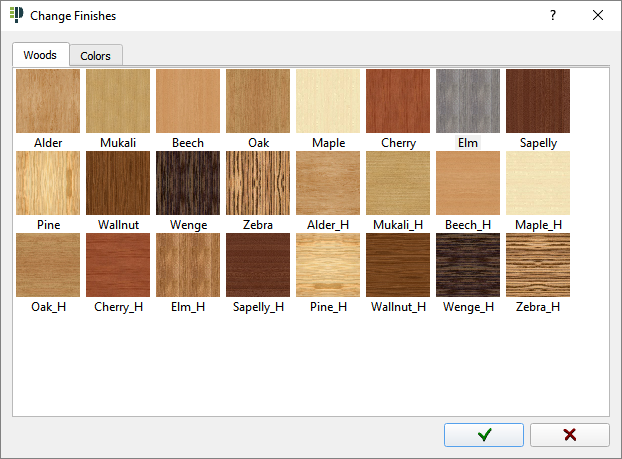
 Change finishes: Clicking this button will show the following window where you will be able to assign materials to the elements to be inserted.
|
|
|
(NOTE: Available tabs of materials depends on the selected element).
|
 Select handle: Click on this button to change handles. This option is available in "Doors", "Drawers with handle", etc.
|
|
"Change Finishes": Allows you to modify handle materials. |
If you select a different measure when modifying the handle, the following window appears asking if you want to move the drawer to fit the new measure:

 Horizontal position: There are 3 buttons that allow you to define the horizontal position of an element:
|
|
Click this button to place an element on the left. |
|
|
Click this button to place an element in the middle. |
|
|
Click this button to place an element on the right. |
 Vertical position: This option is similar to the previous one, allowing you to define the vertical position of an element. It is available on "drawers with handle", "doors", etc.:


